How to set up 1:1 meetings between attendees
1:1 meetings are conversations between two attendees booked in advance, often called B2B meetings at industry conferences. In the SF-CONFERENCE system an attendee publishes a networking profile, chooses a person from the list and books a free time, and the system assigns a table by itself. You decide who can take part, at what hours meetings take place and whether the other side has to accept them.
This guide walks through switching on the module, the participant and profile settings, the default calendar, meeting places, what attendees see, and the overview of all meetings in the panel.
Switching on the 1:1 meetings module
Under Settings in the side menu of the panel, on the Modules tab, turn on the switch on the 1:1 meetings card and save the changes. A 1:1 meetings tab appears in the settings, and an item with the same name in the side menu lists all meetings.
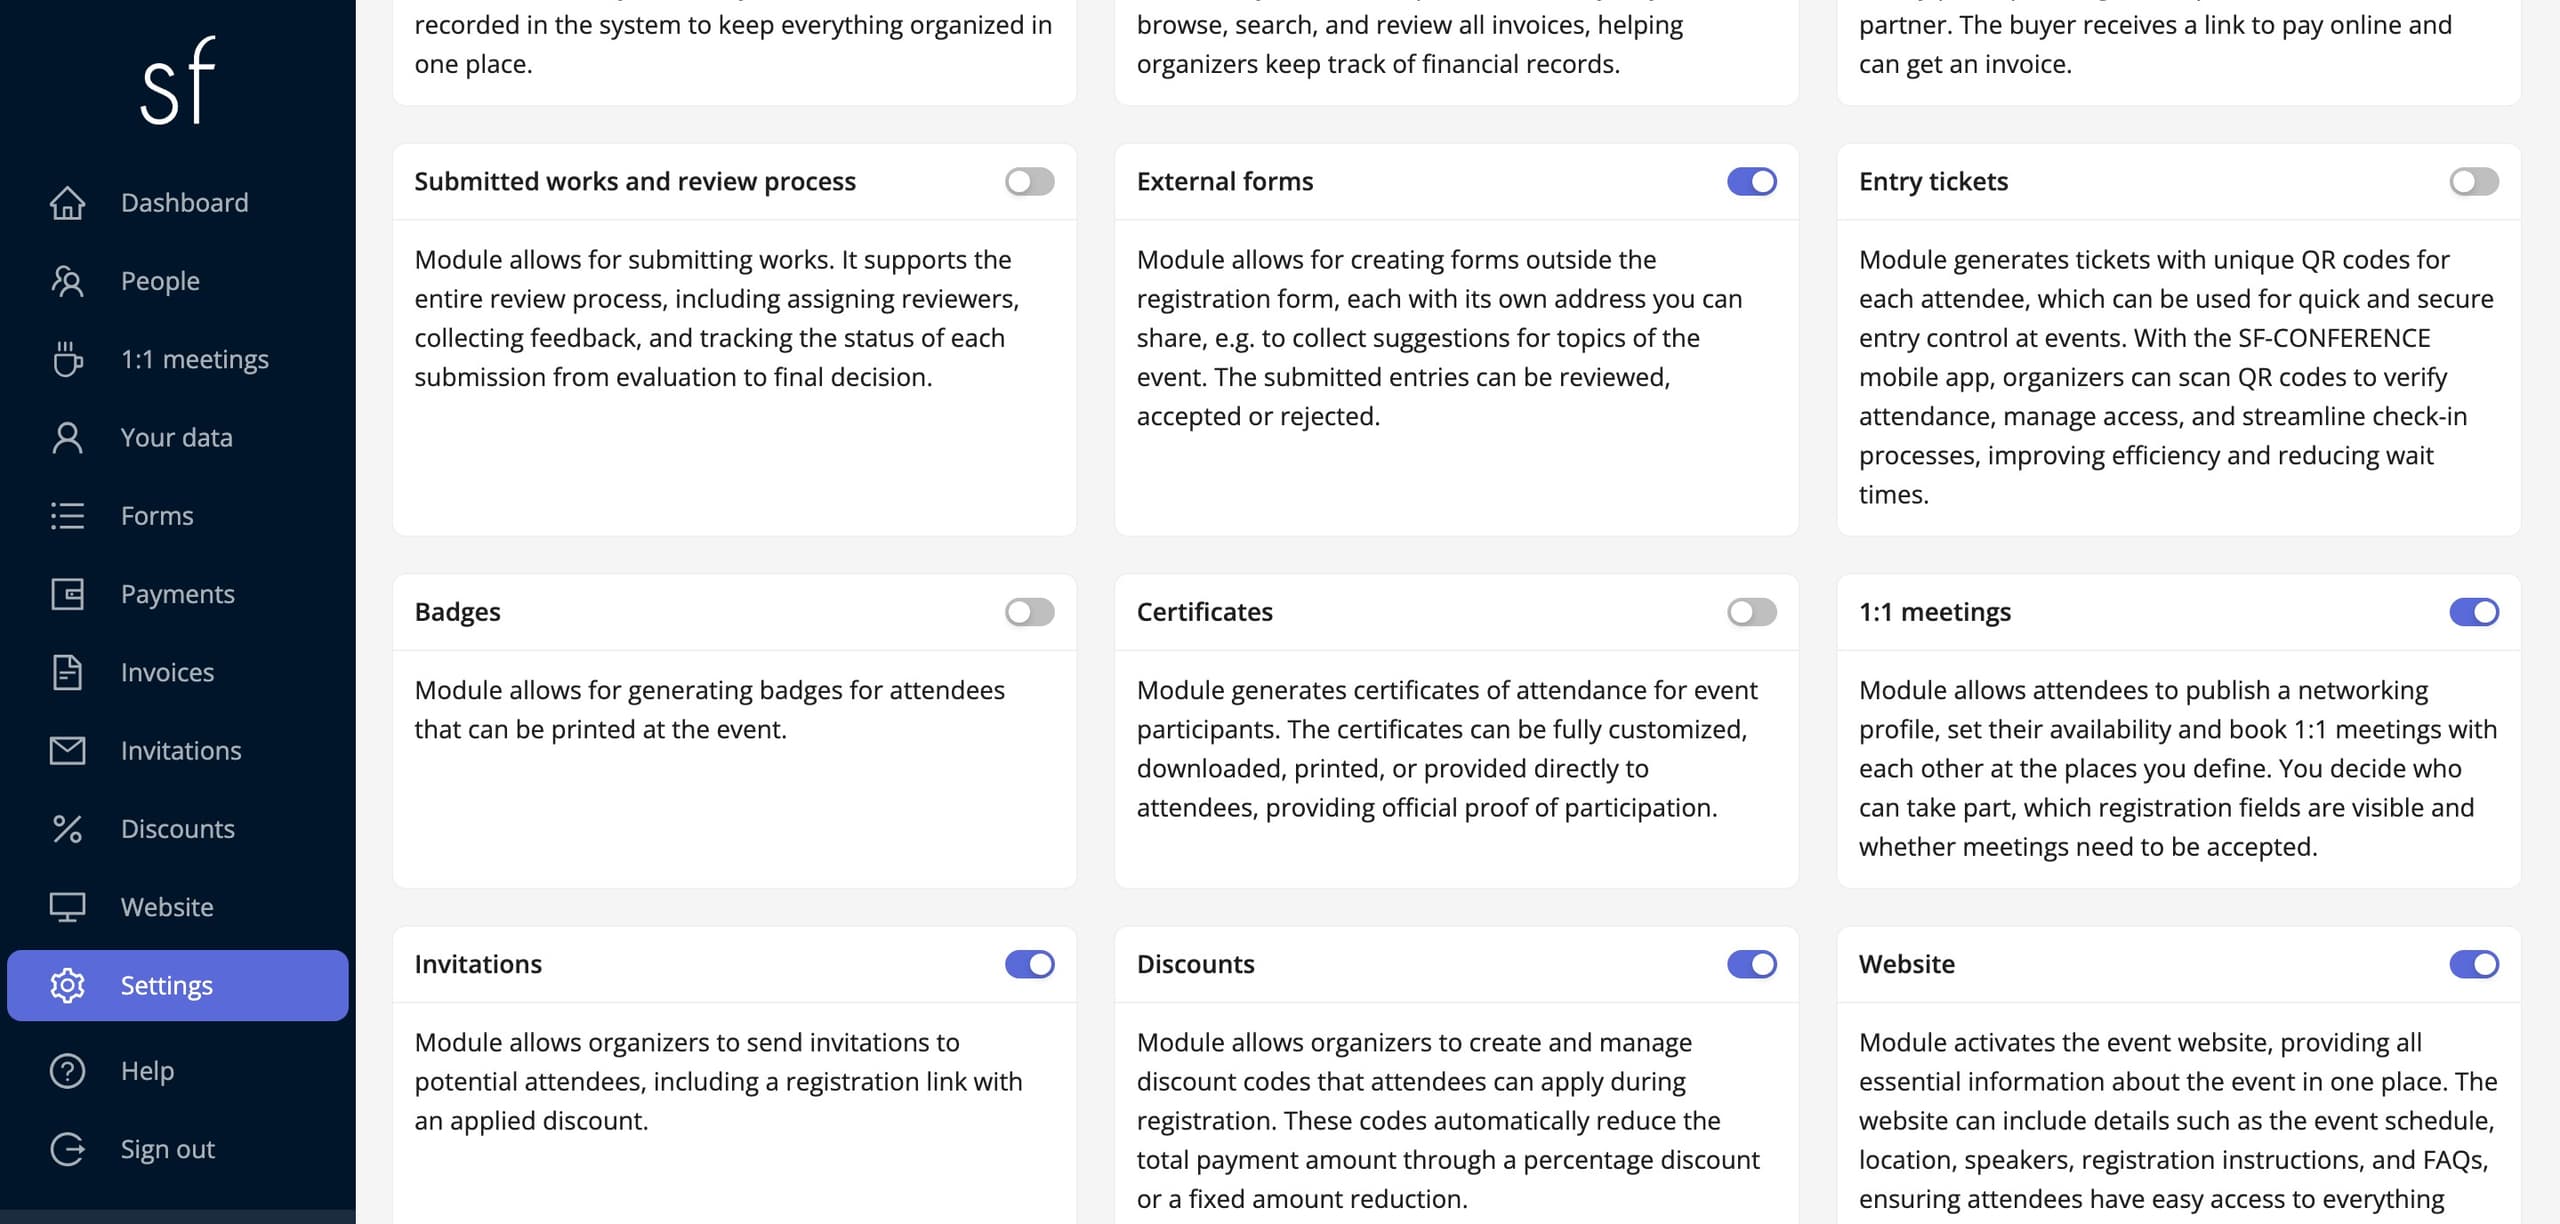
Who takes part and whether meetings need acceptance
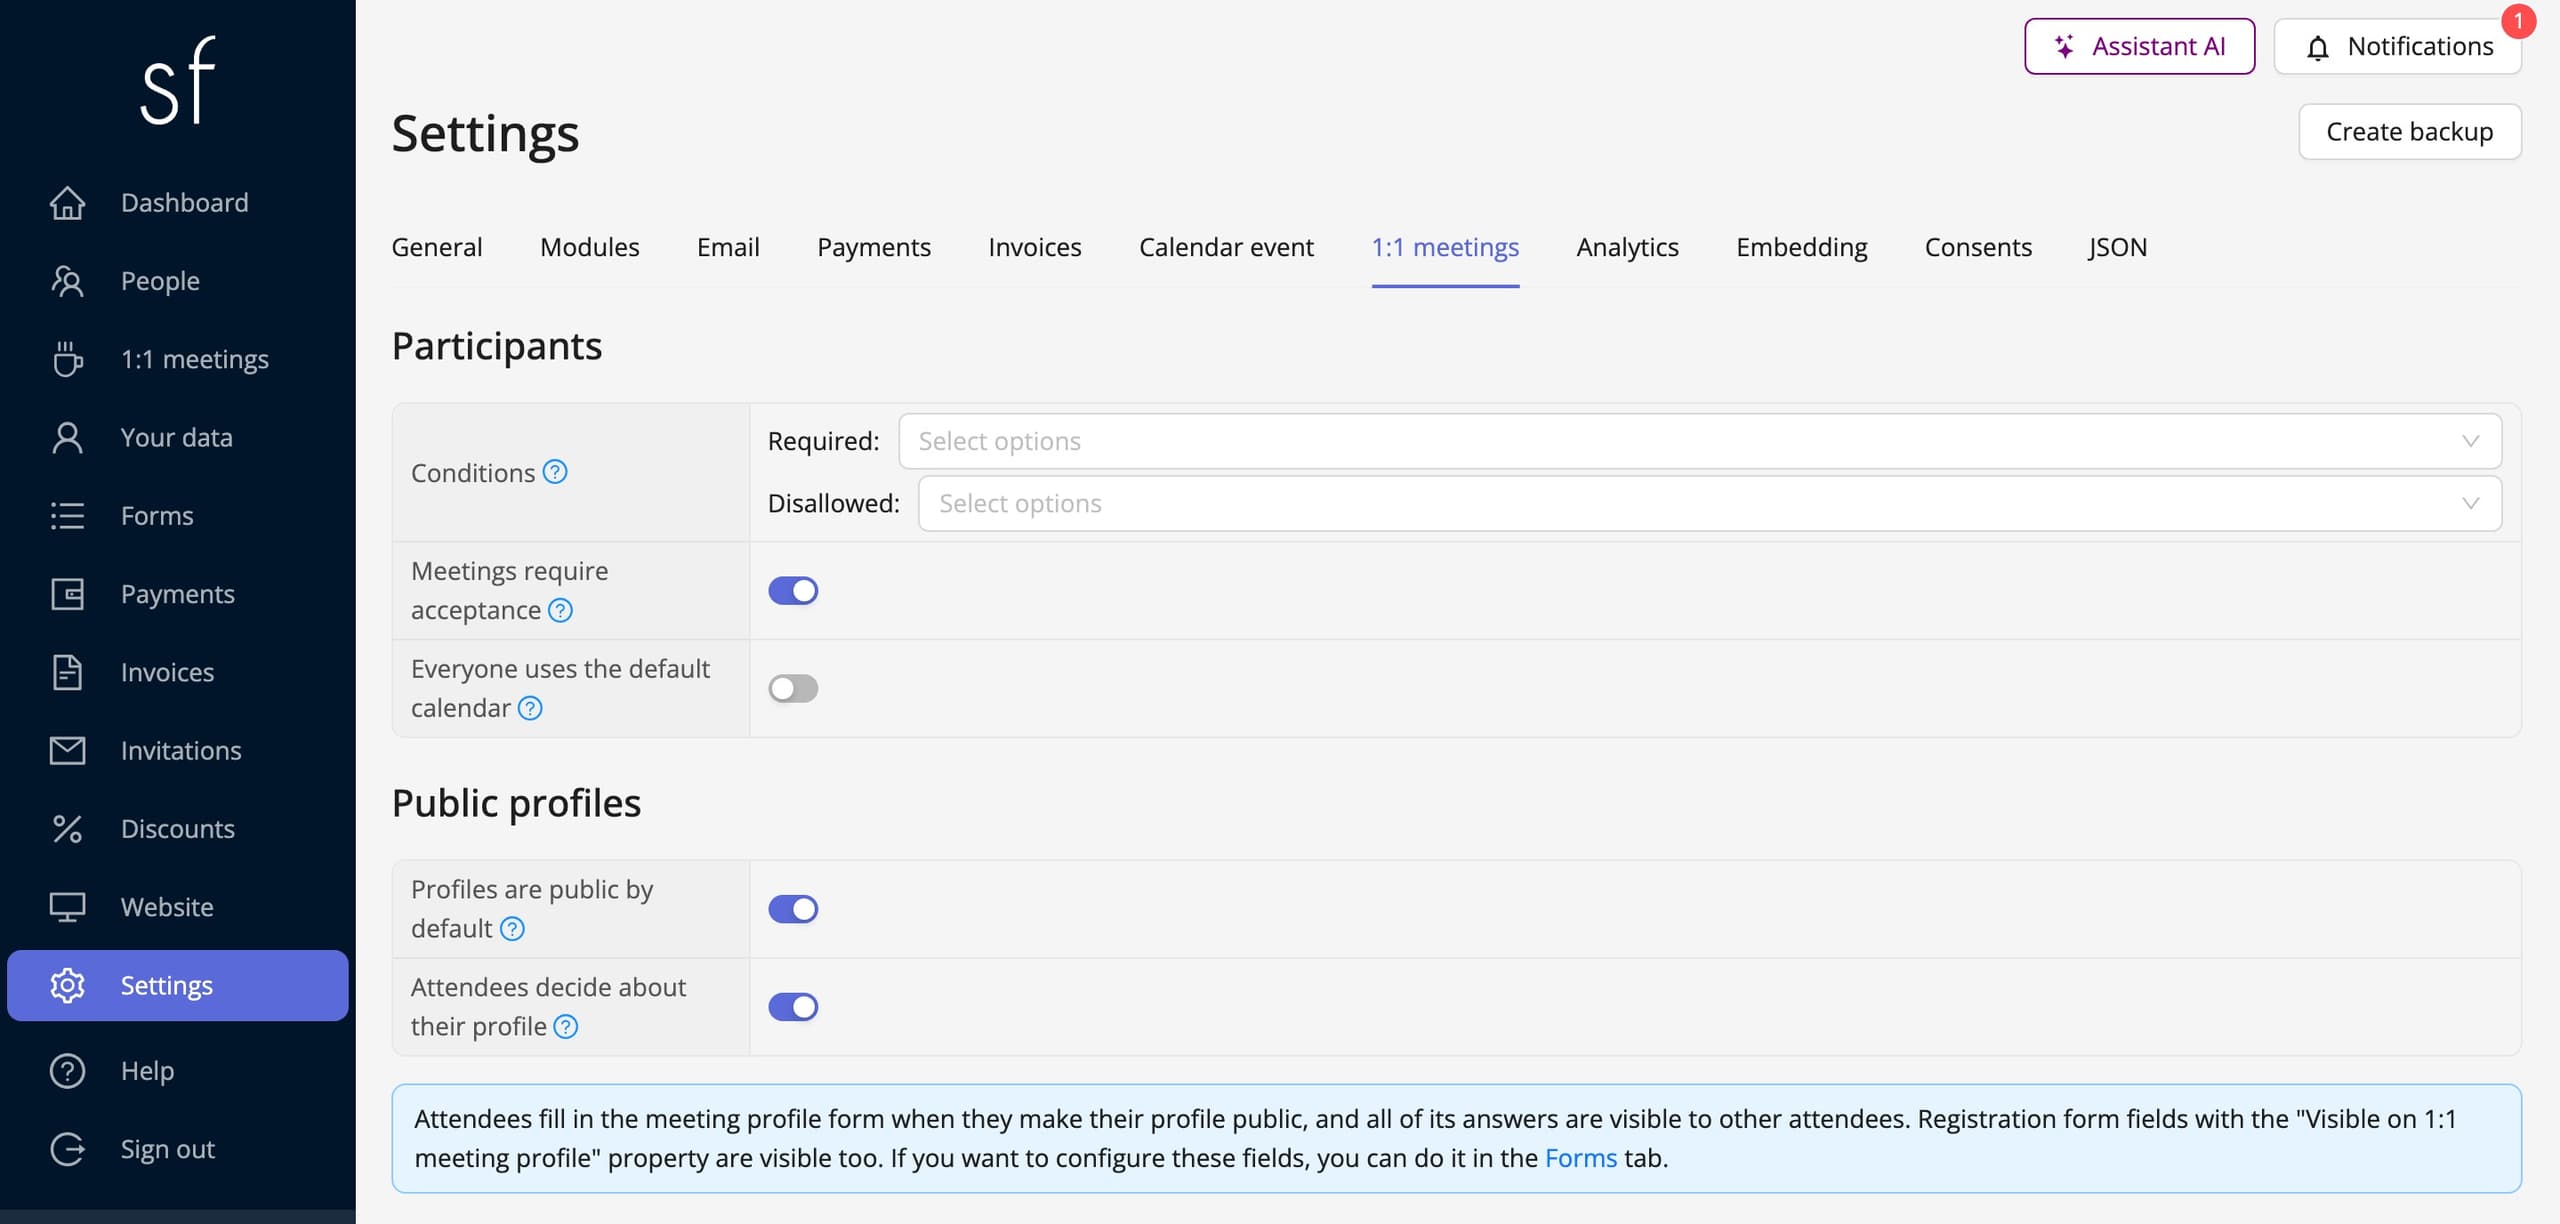
The 1:1 meetings tab starts with the Participants section. Only accepted attendees can book meetings, and the Conditions field narrows them down further by their answers in the registration form. For example, you can leave out people taking part online.
The Meetings require acceptance switch decides whether the invited person has to confirm a meeting. When it is off, a meeting is confirmed as soon as it is booked. The Everyone uses the default calendar switch stops attendees from changing their own hours, which helps when meetings should only take place in a set block of the programme.
In the Public profiles section you set how profiles are shown. When you turn on Profiles are public by default, every eligible attendee appears on the list of people open to meetings right away. The Attendees decide about their profile switch lets them hide or publish their profile themselves. When it is off, only you decide who is visible.
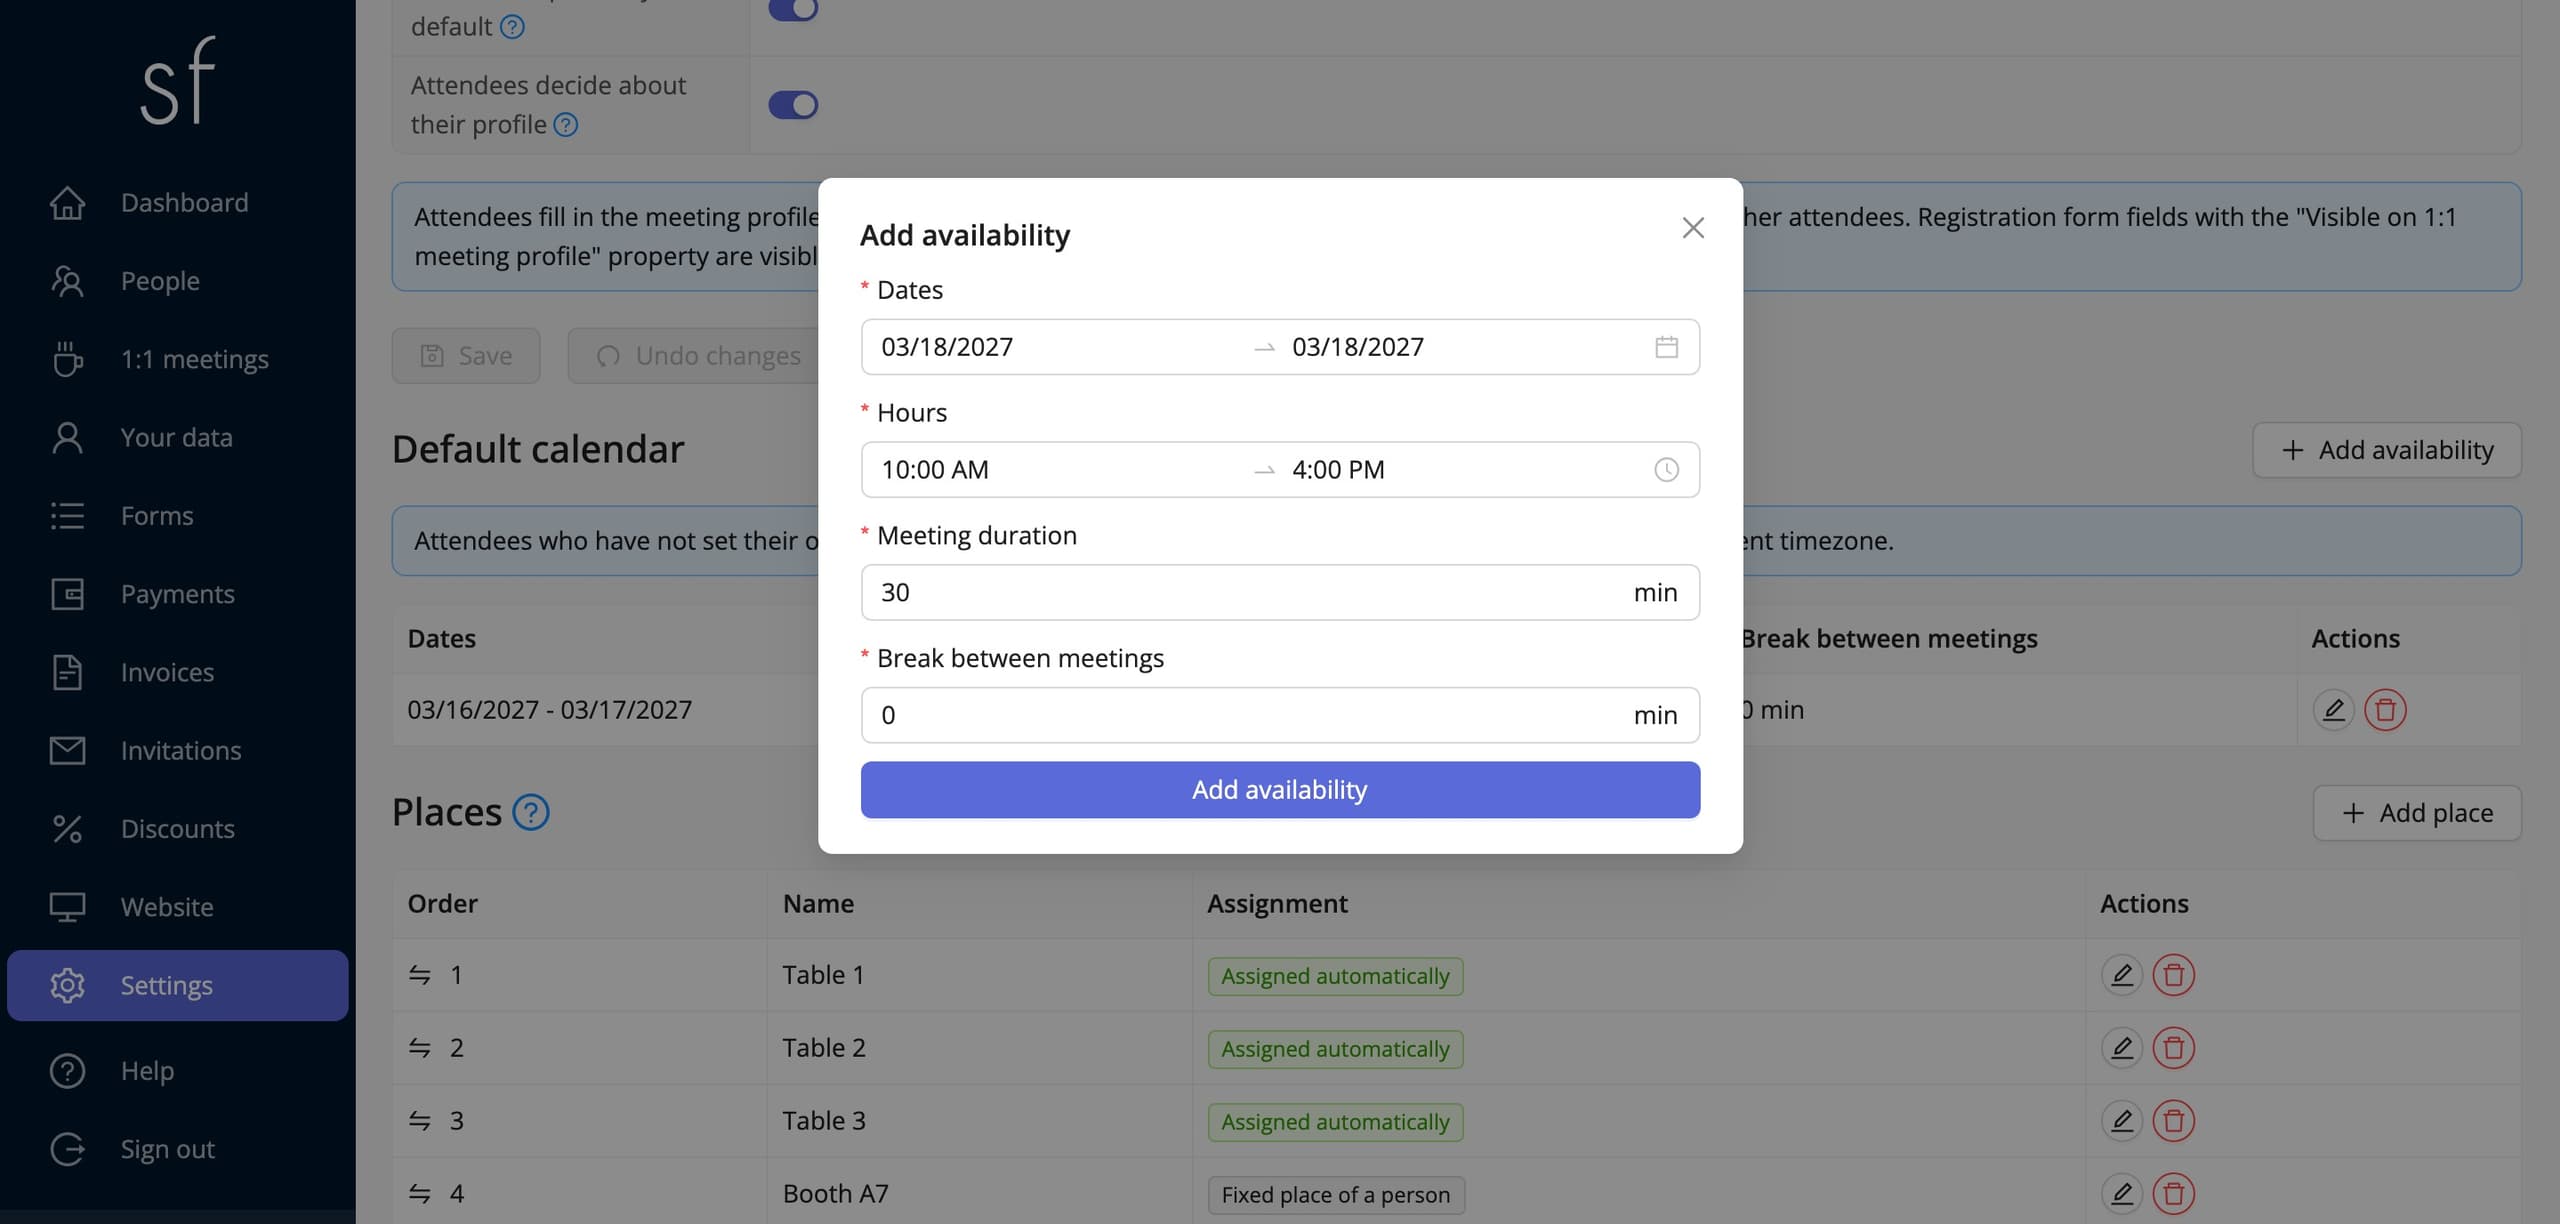
Default calendar
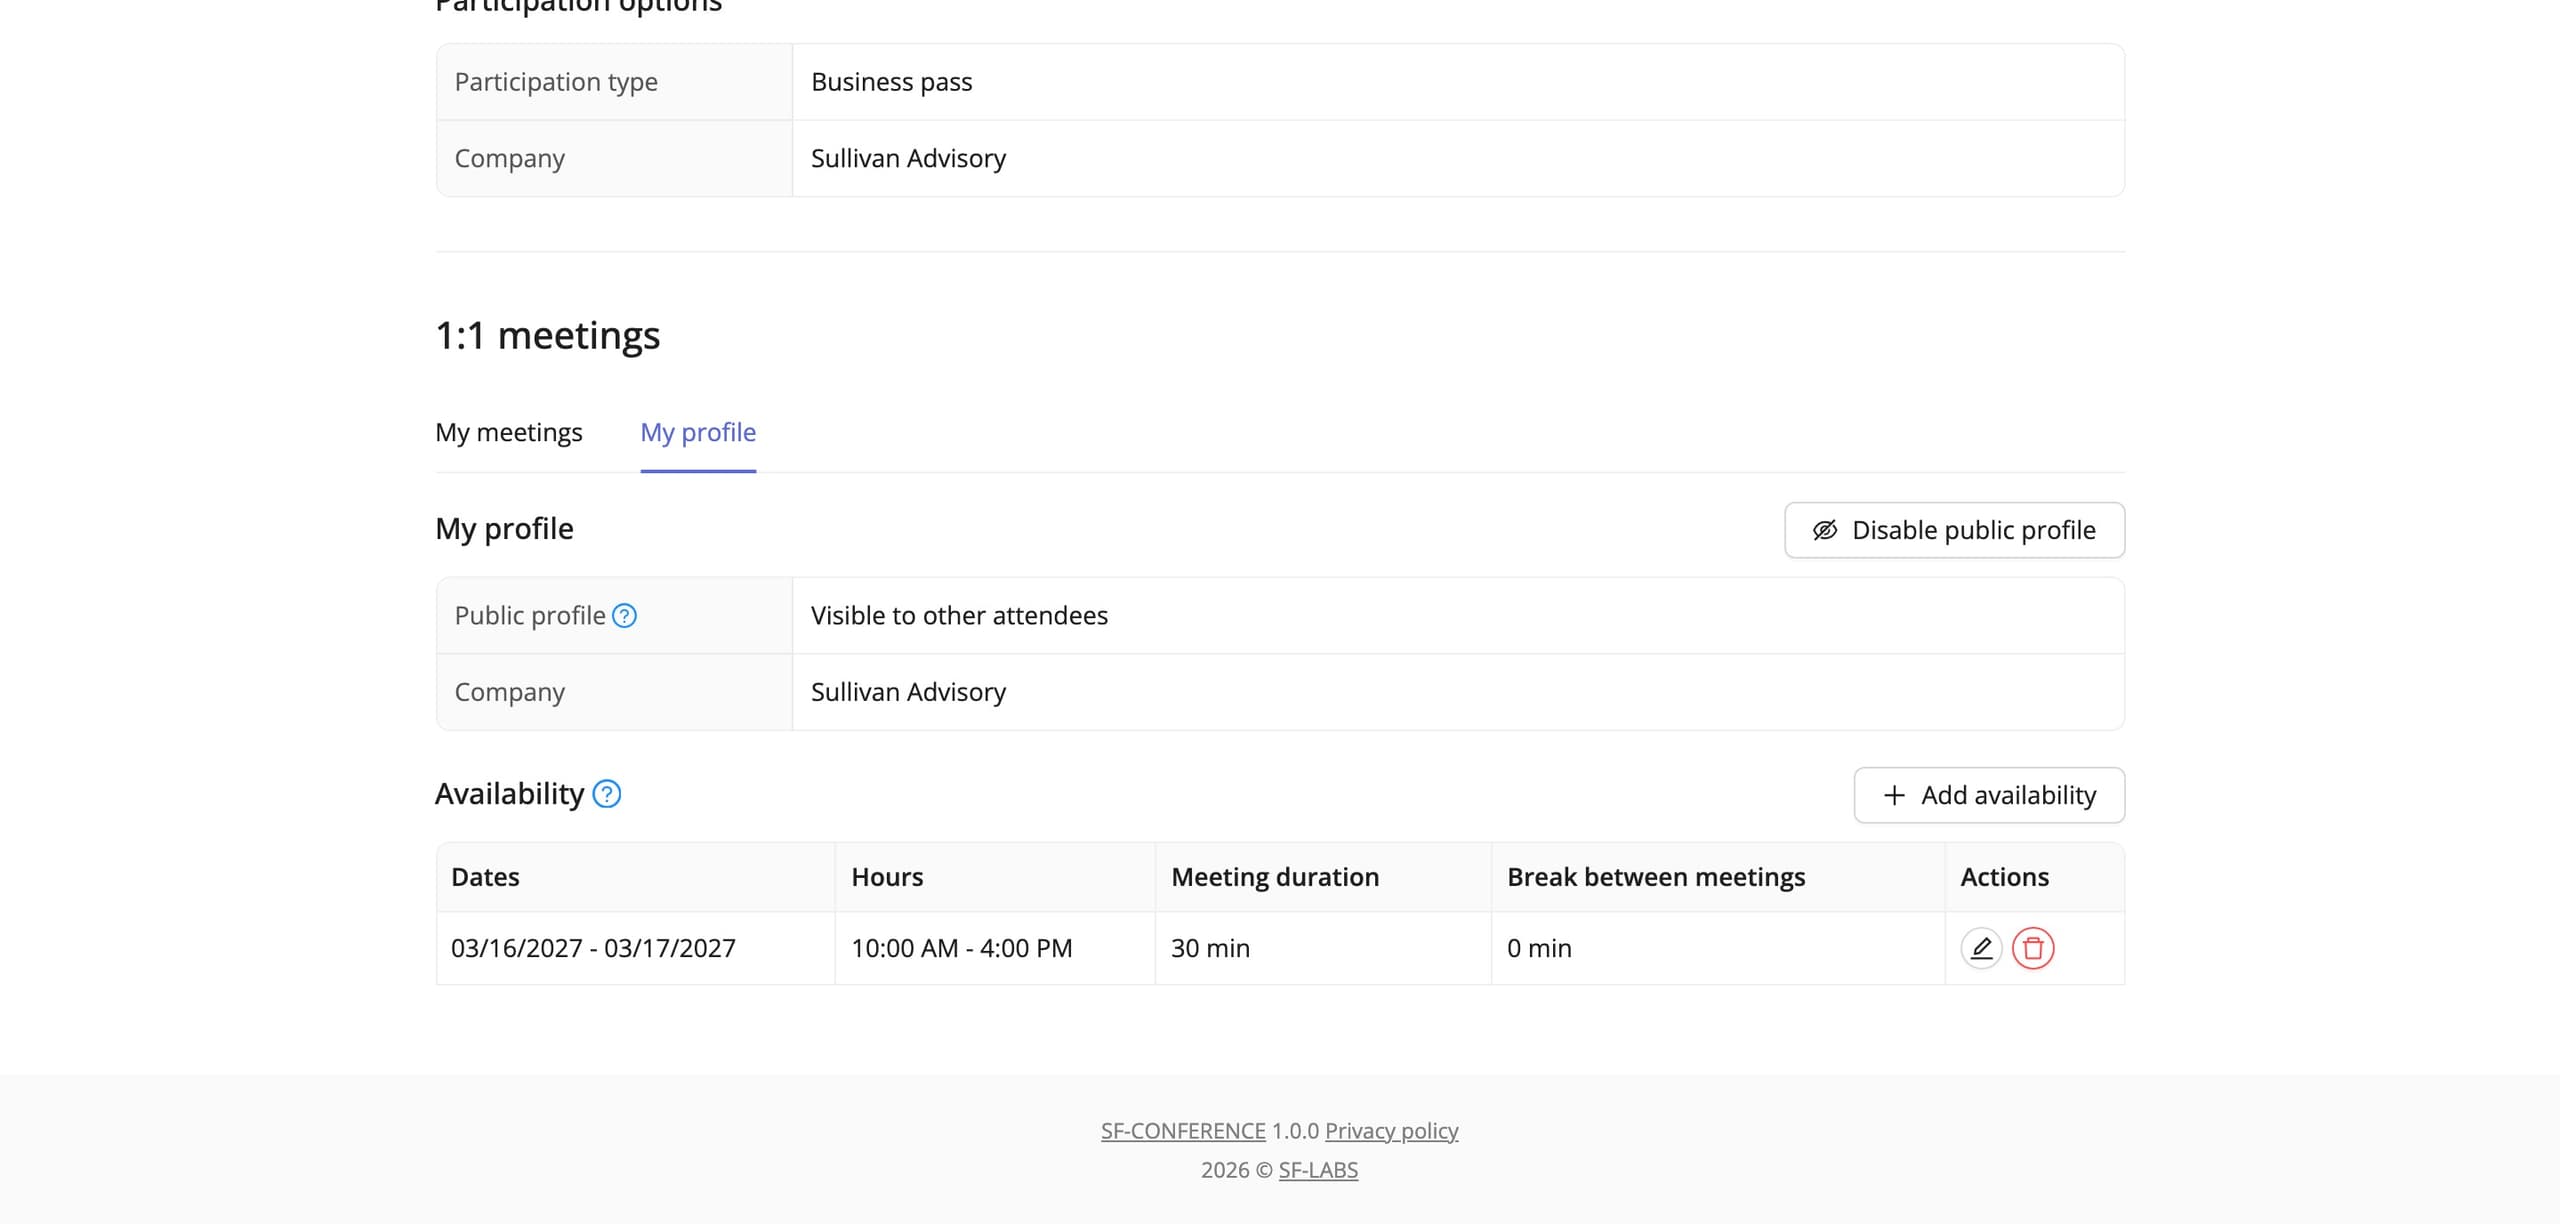
The Default calendar section sets the days and hours when attendees who have not set their own availability can be booked. The Add availability button opens a window with the Dates, Hours, Meeting duration and Break between meetings fields. The system splits each range into slots of the given length, for example from 10:00 to 16:00 every 30 minutes. The hours are in the event's time zone, and every change is saved right away.
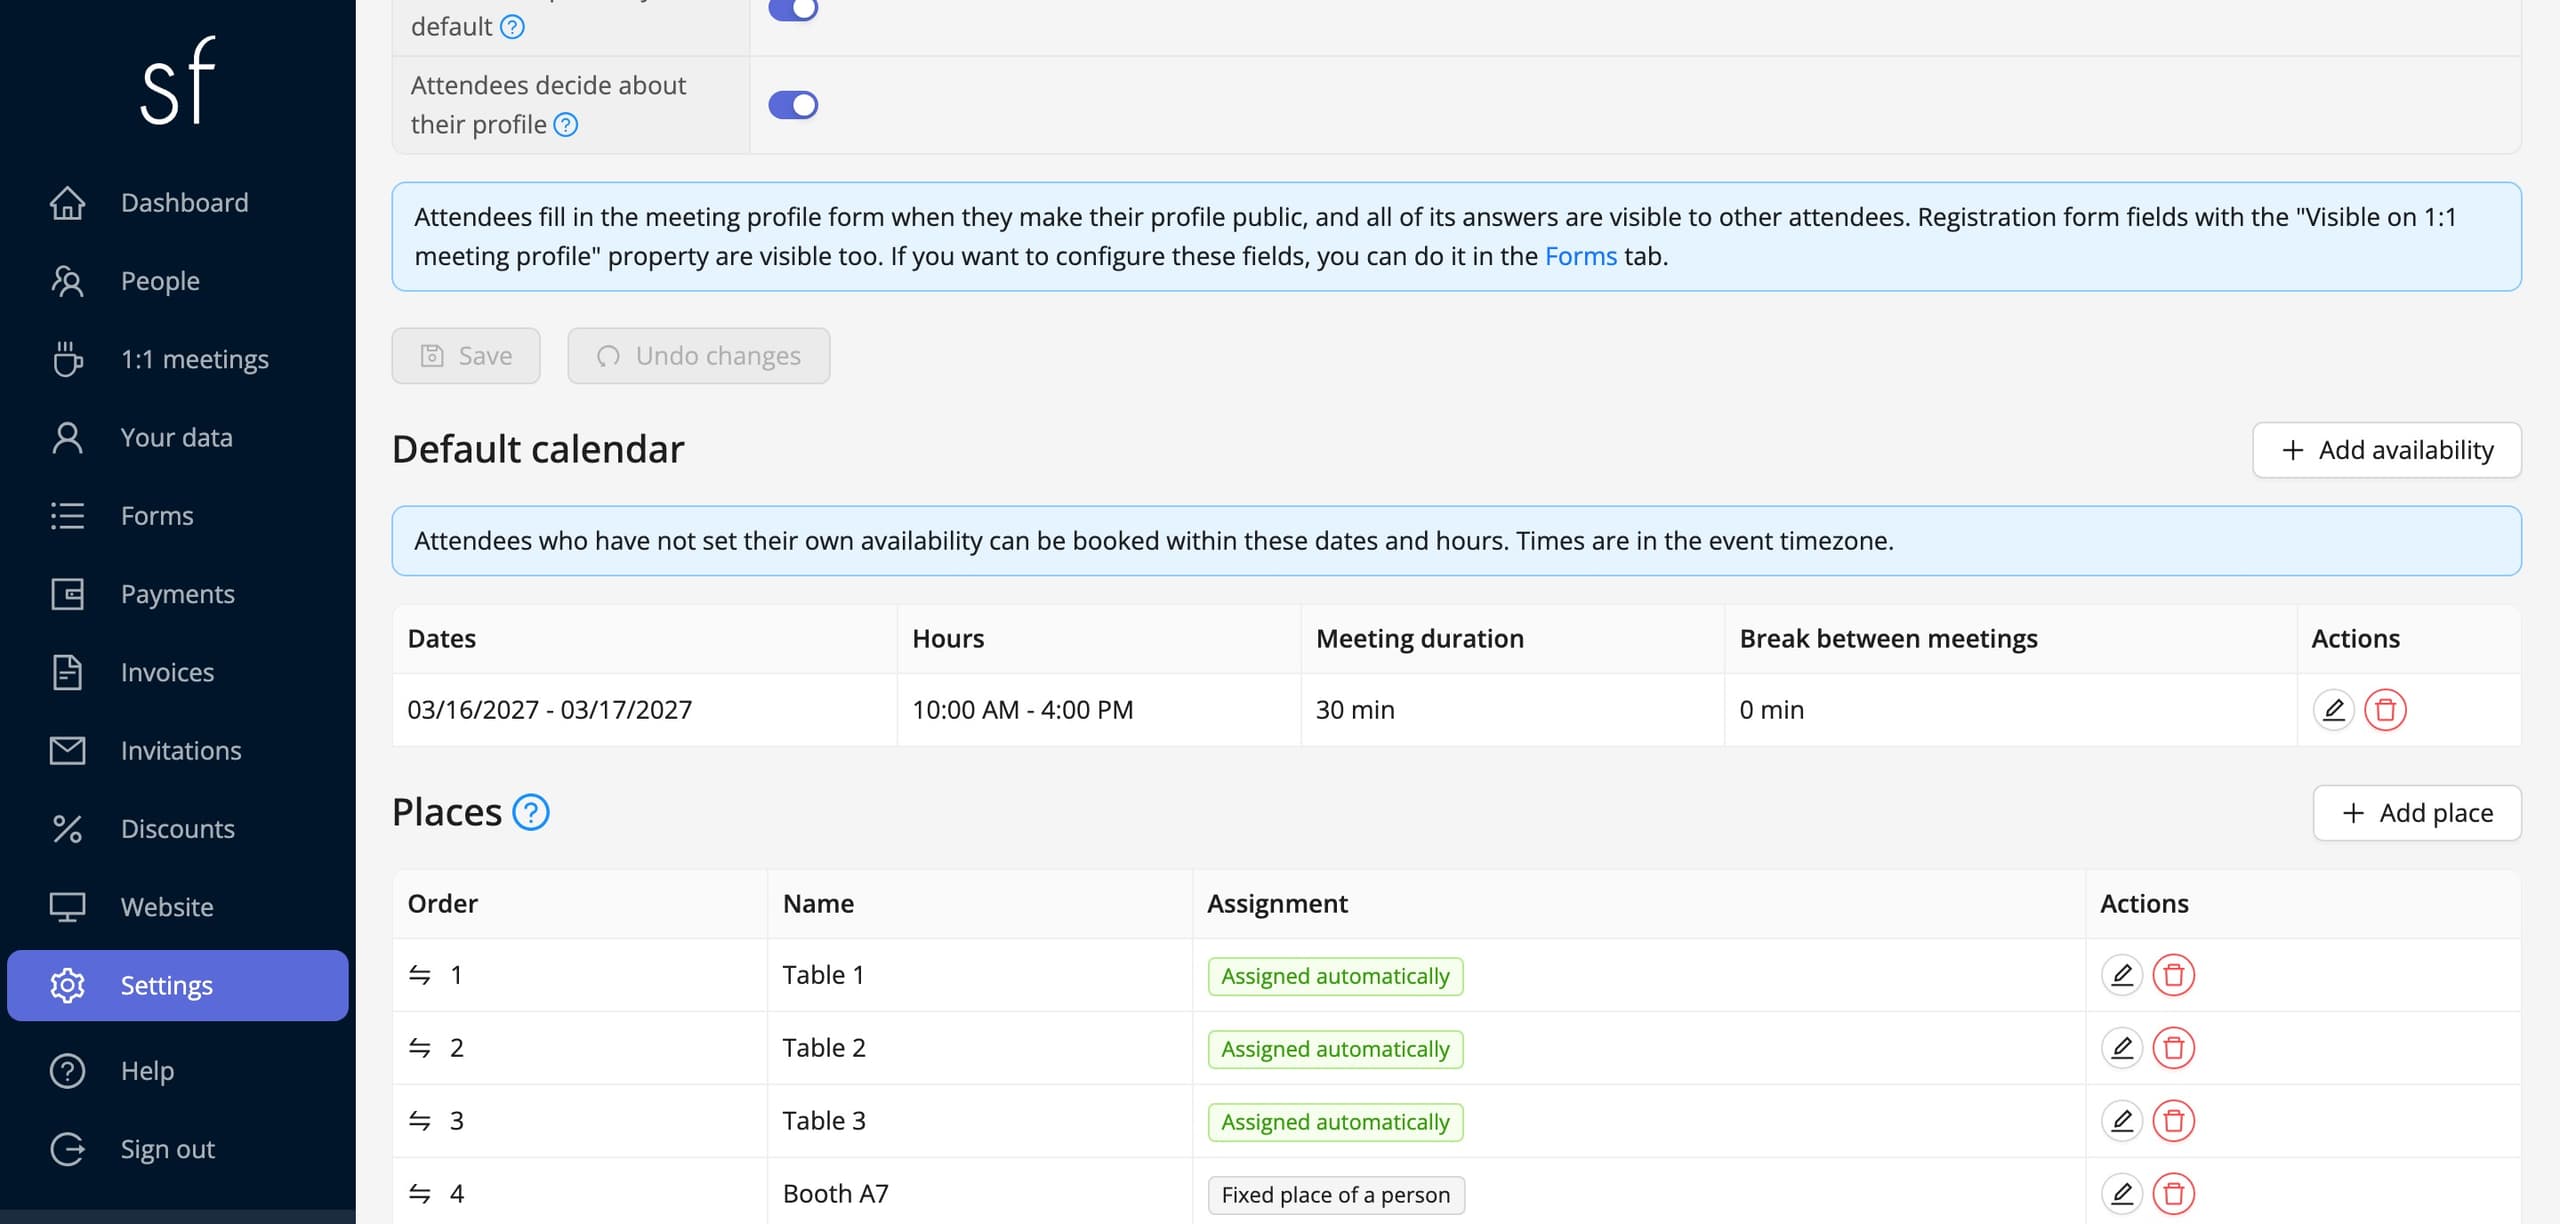
Meeting places
In the Places section you add tables, rooms or booths with the Add place button. Every new meeting gets the first place that is free at its time, in the order of this list, so the number of places is also the number of meetings that can run at once. You change the order in the Order column.
An exhibitor can get a fixed place, their own booth. You set it on that person's page, in the 1:1 meetings section, on the Profile tab. Then all of their meetings take place at that booth, and the place is not assigned to anyone else. Without any places, meetings are booked without one, which works well for online events.
What attendees see on profiles
An attendee's profile comes from two sources. The first is the Meeting profile form under Forms, in which you add questions, for example about the company or the topic of the conversation. Attendees answer them when they turn on their public profile. The second is the registration form fields with the Visible on 1:1 meeting profile property, such as job title or industry, which attendees do not have to type in again. Other attendees see all of these answers.
How an attendee books a meeting
Attendees open meetings in their panel or on their registration summary page, linked in the email they got after registering. On the My profile tab they turn on their public profile and set their Availability if they only want to meet during some of the hours.
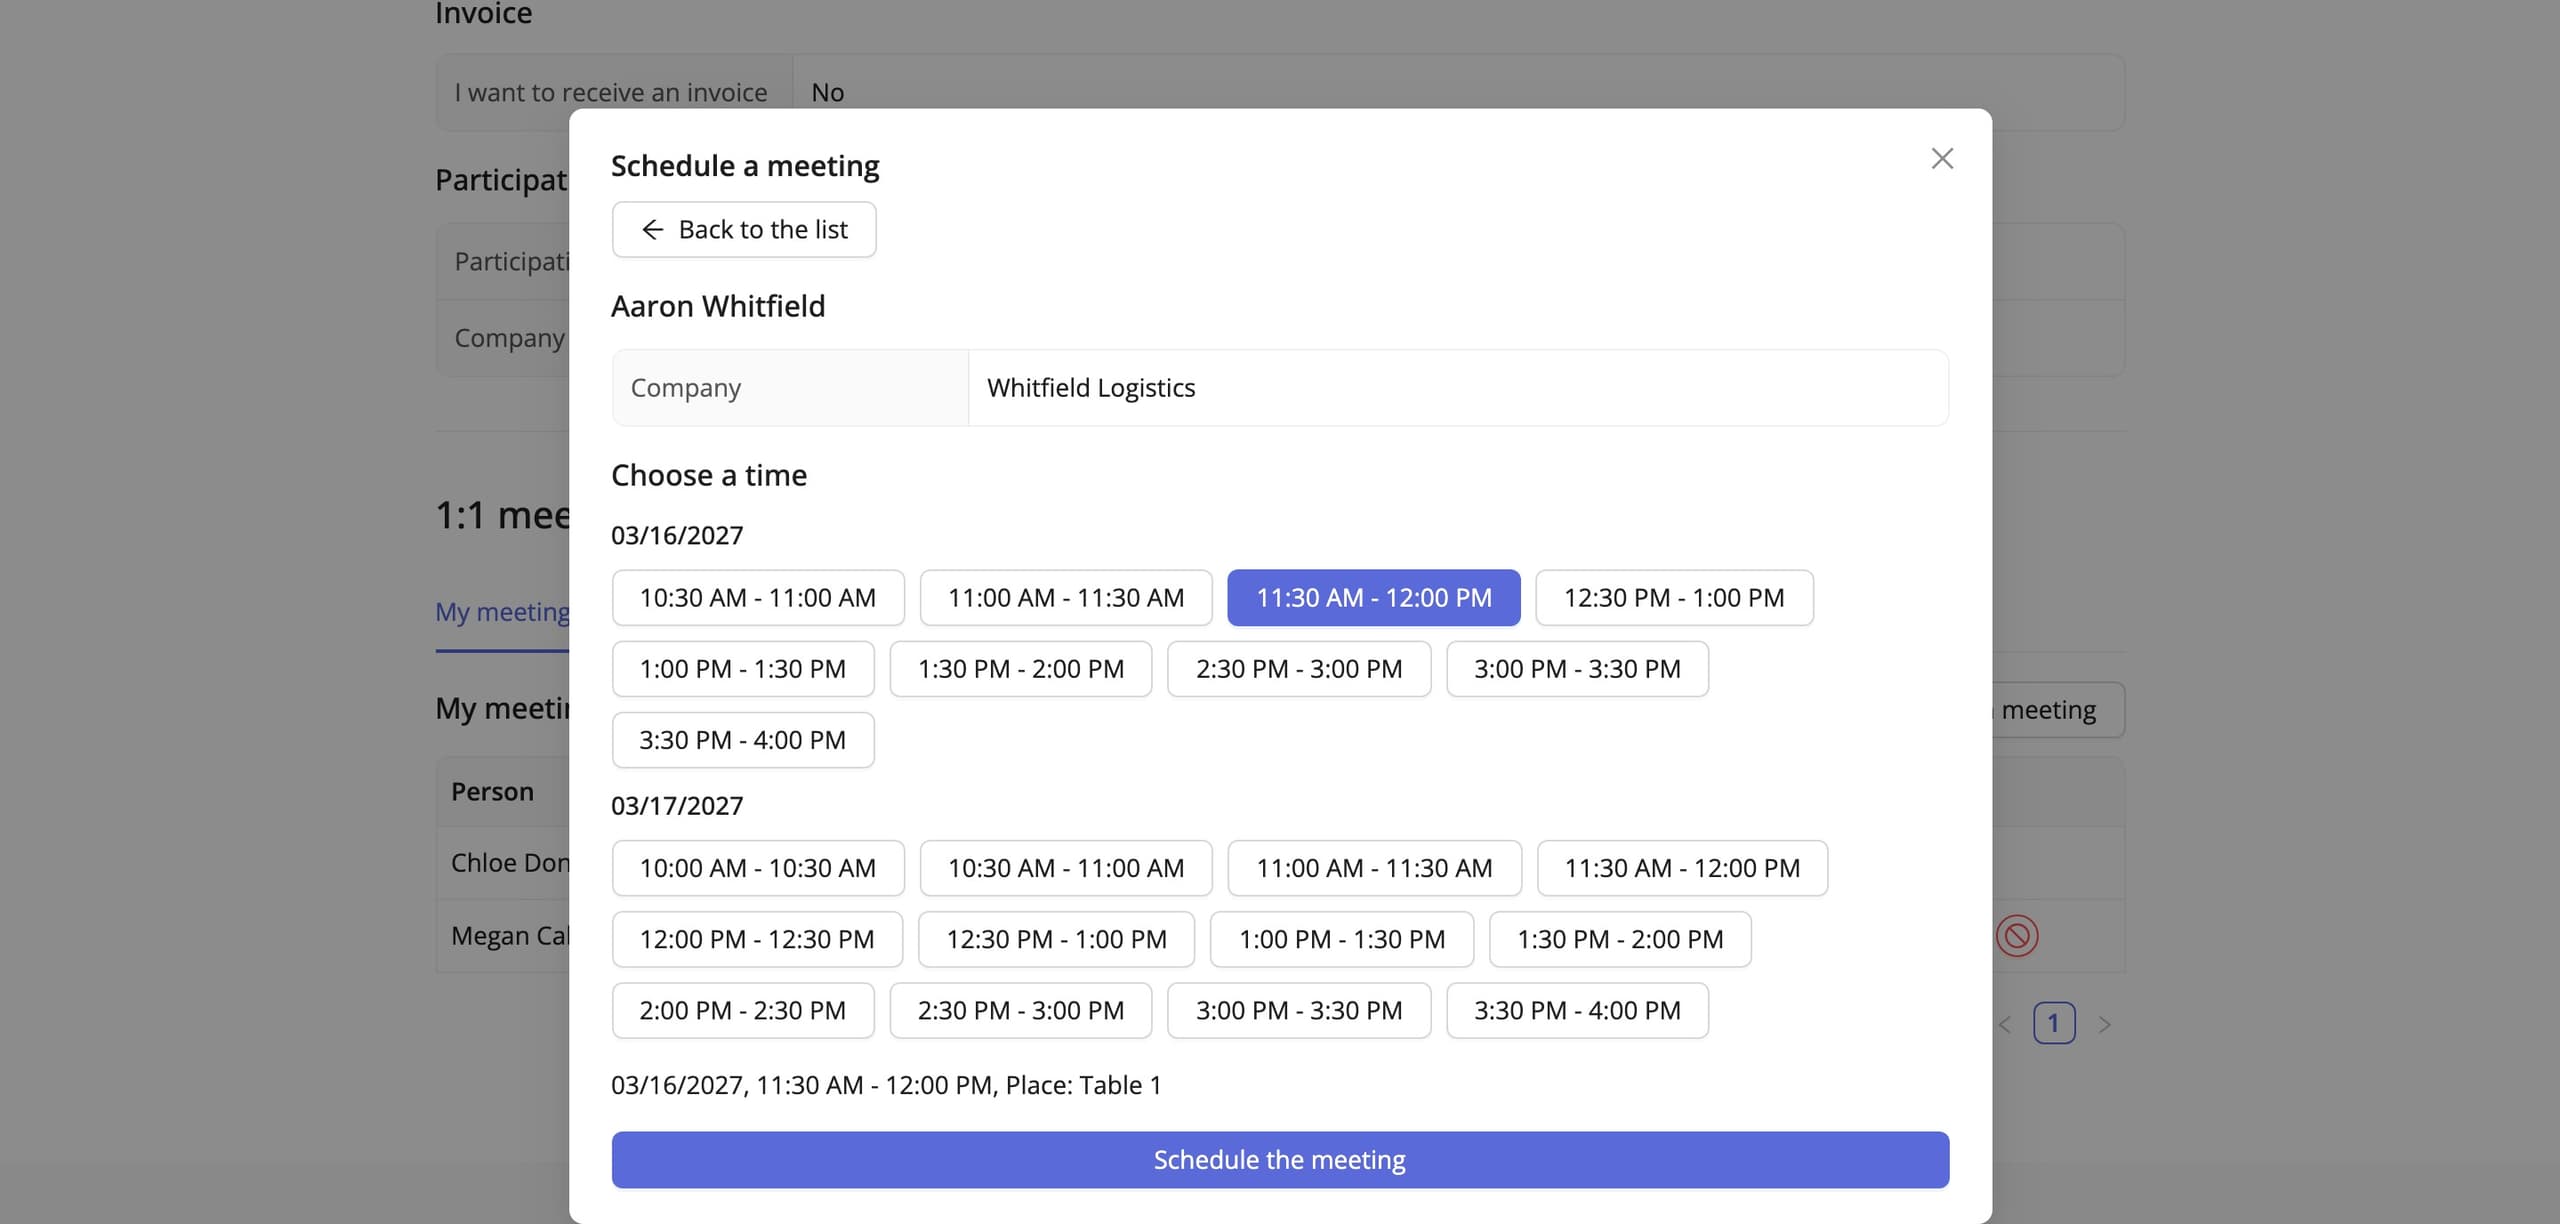
The Schedule a meeting button opens the list of people open to meetings. The attendee chooses a person, and the system shows only the times when both sides are available and a place is free. After Schedule the meeting, the invited person gets an email. When meetings need acceptance, the meeting waits for their decision, and once it is confirmed both sides get a calendar file with the time and the table. The invited person can also decline the meeting and block further requests from the same person.
Overview of all meetings
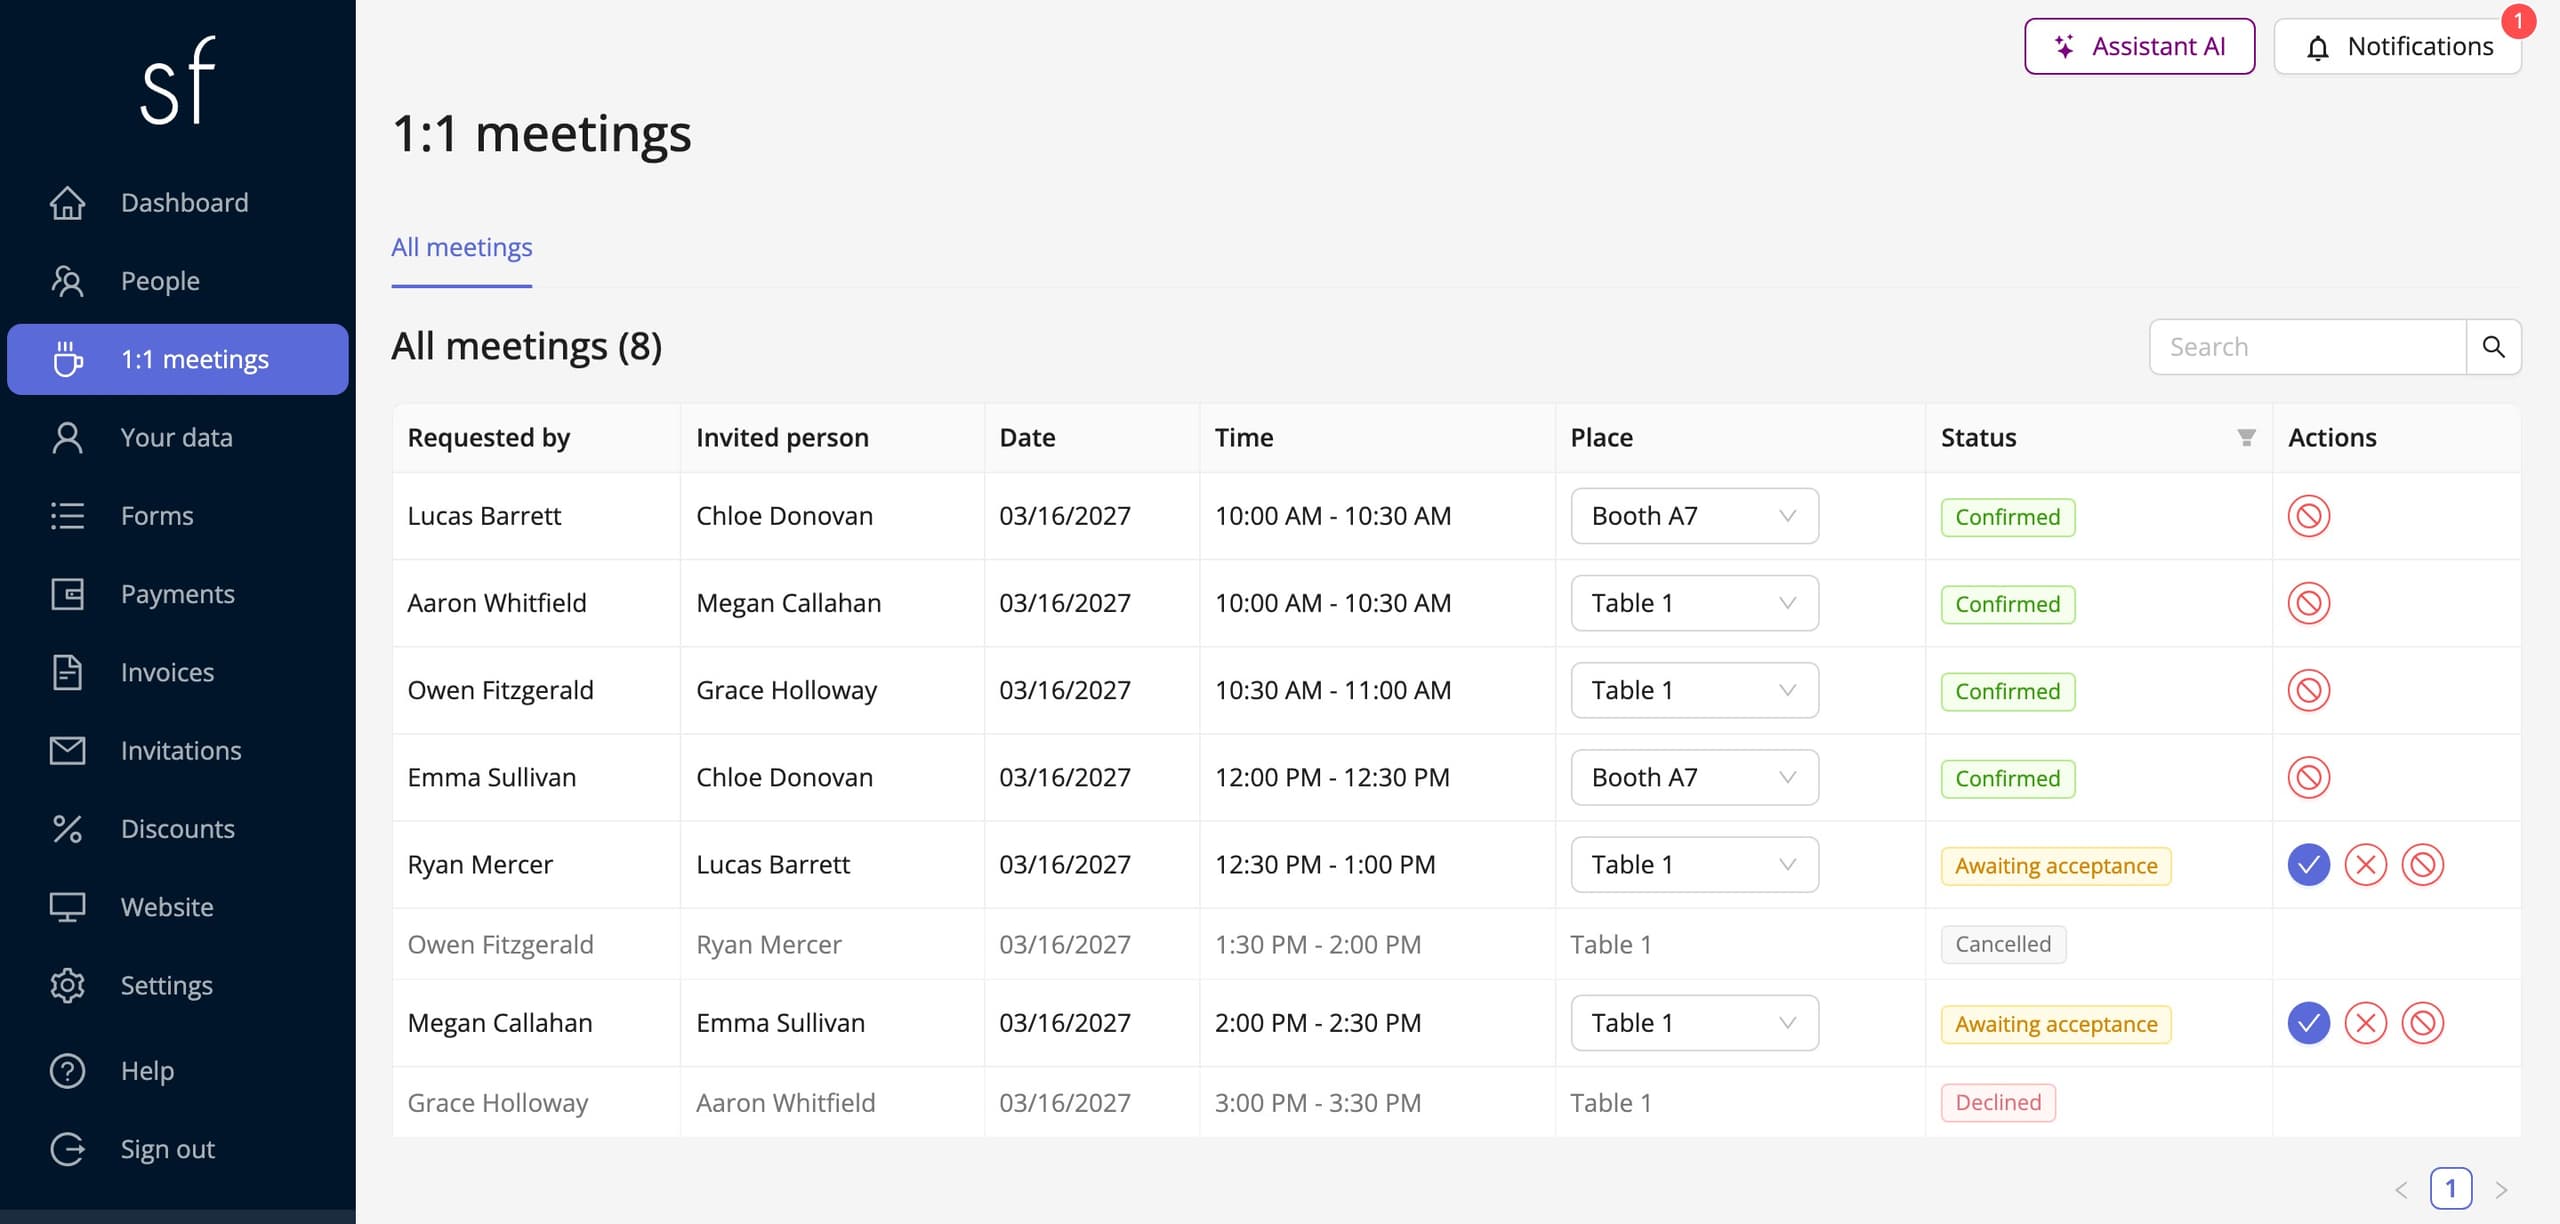
The 1:1 meetings item in the side menu opens the All meetings tab: who requested the meeting, who was invited, the date, the time, the place and the status. Here you can move a meeting to another table, and both people get an email about the change, and you can also accept, decline or cancel a meeting on behalf of an attendee. On each person's page, in the 1:1 meetings section, you can book a meeting for them, change their profile or set their own calendar.
You edit the emails about booking, confirmation, cancellation and changes to a meeting in the settings, on the Email tab, in the 1:1 meetings category. To see how meetings fit into a whole business conference, read the page about industry conferences, and every feature of the module is described on the 1:1 meetings page.
See also
How to accept group registrations
A representative registers several attendees with one form: shared fields, one collective payment and a company invoice.
How to edit the registration form
Add and change fields, set prices, dates and dependencies between answers and decide when registration is open.
How to send event invitations
Send guests personal invitations carrying their own link and discount, or share one registration link with a group.

Complete event management on a single platform. An event website, attendee registration and a full set of organizer tools.
2026 © SF-LABS sp. z o.o. All rights reserved
Entered into the register of entrepreneurs of the National Court Register kept by the District Court for Kraków-Śródmieście in Kraków, 11th Commercial Division of the National Court Register, under KRS number 0000886671. Share capital amount: PLN 5,000.