How to enable entry tickets and scan them at the entrance
An entry ticket is a PDF document with a unique QR code that the SF-CONFERENCE system generates separately for every attendee. The attendee brings it to the event printed or on a phone screen, and the staff scans the code at the entrance: with the mobile app or with an ordinary code reader connected to a computer over USB. Right after the scan you can see whether the person is on the list, whether they paid and whether this ticket has already been used.
This instruction walks through the whole path: enabling the module, the settings, the ticket template, delivering it to attendees and both ways of scanning.
Enabling the entry tickets module
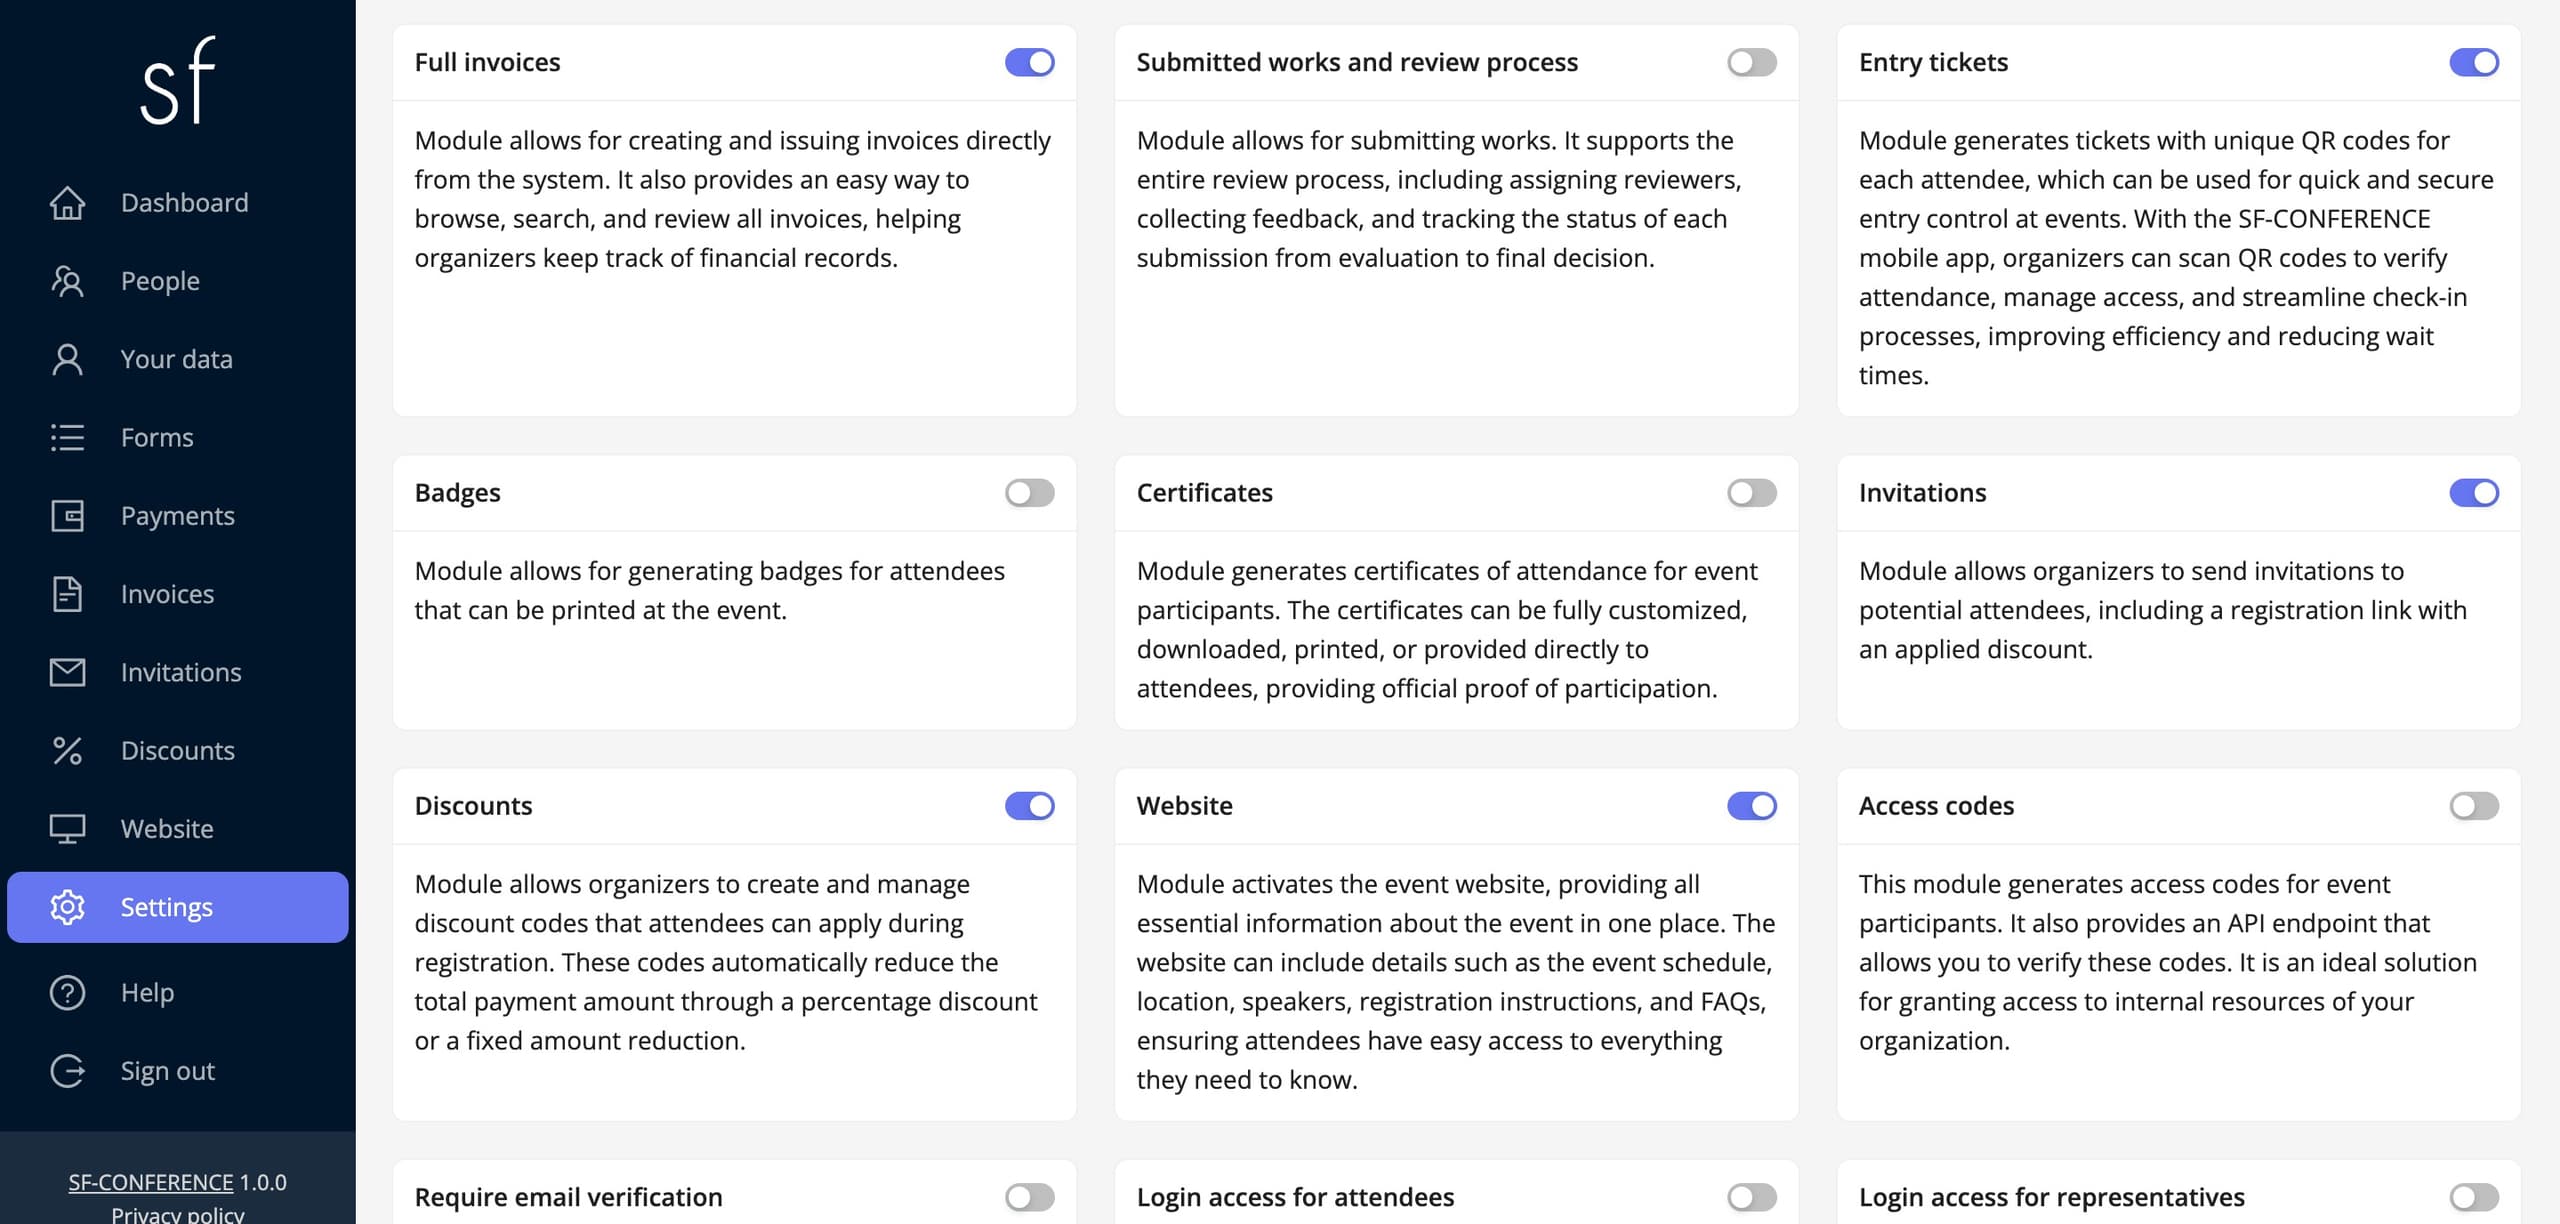
Tickets are a module, and on a freshly created event it is switched off. In the Settings entry in the panel's side menu, on the Modules tab, find the Entry tickets card and flip its switch. Once saved, a new Entry tickets tab appears in the settings, and a scanning button in the People entry.
Settings: the download and the guest list
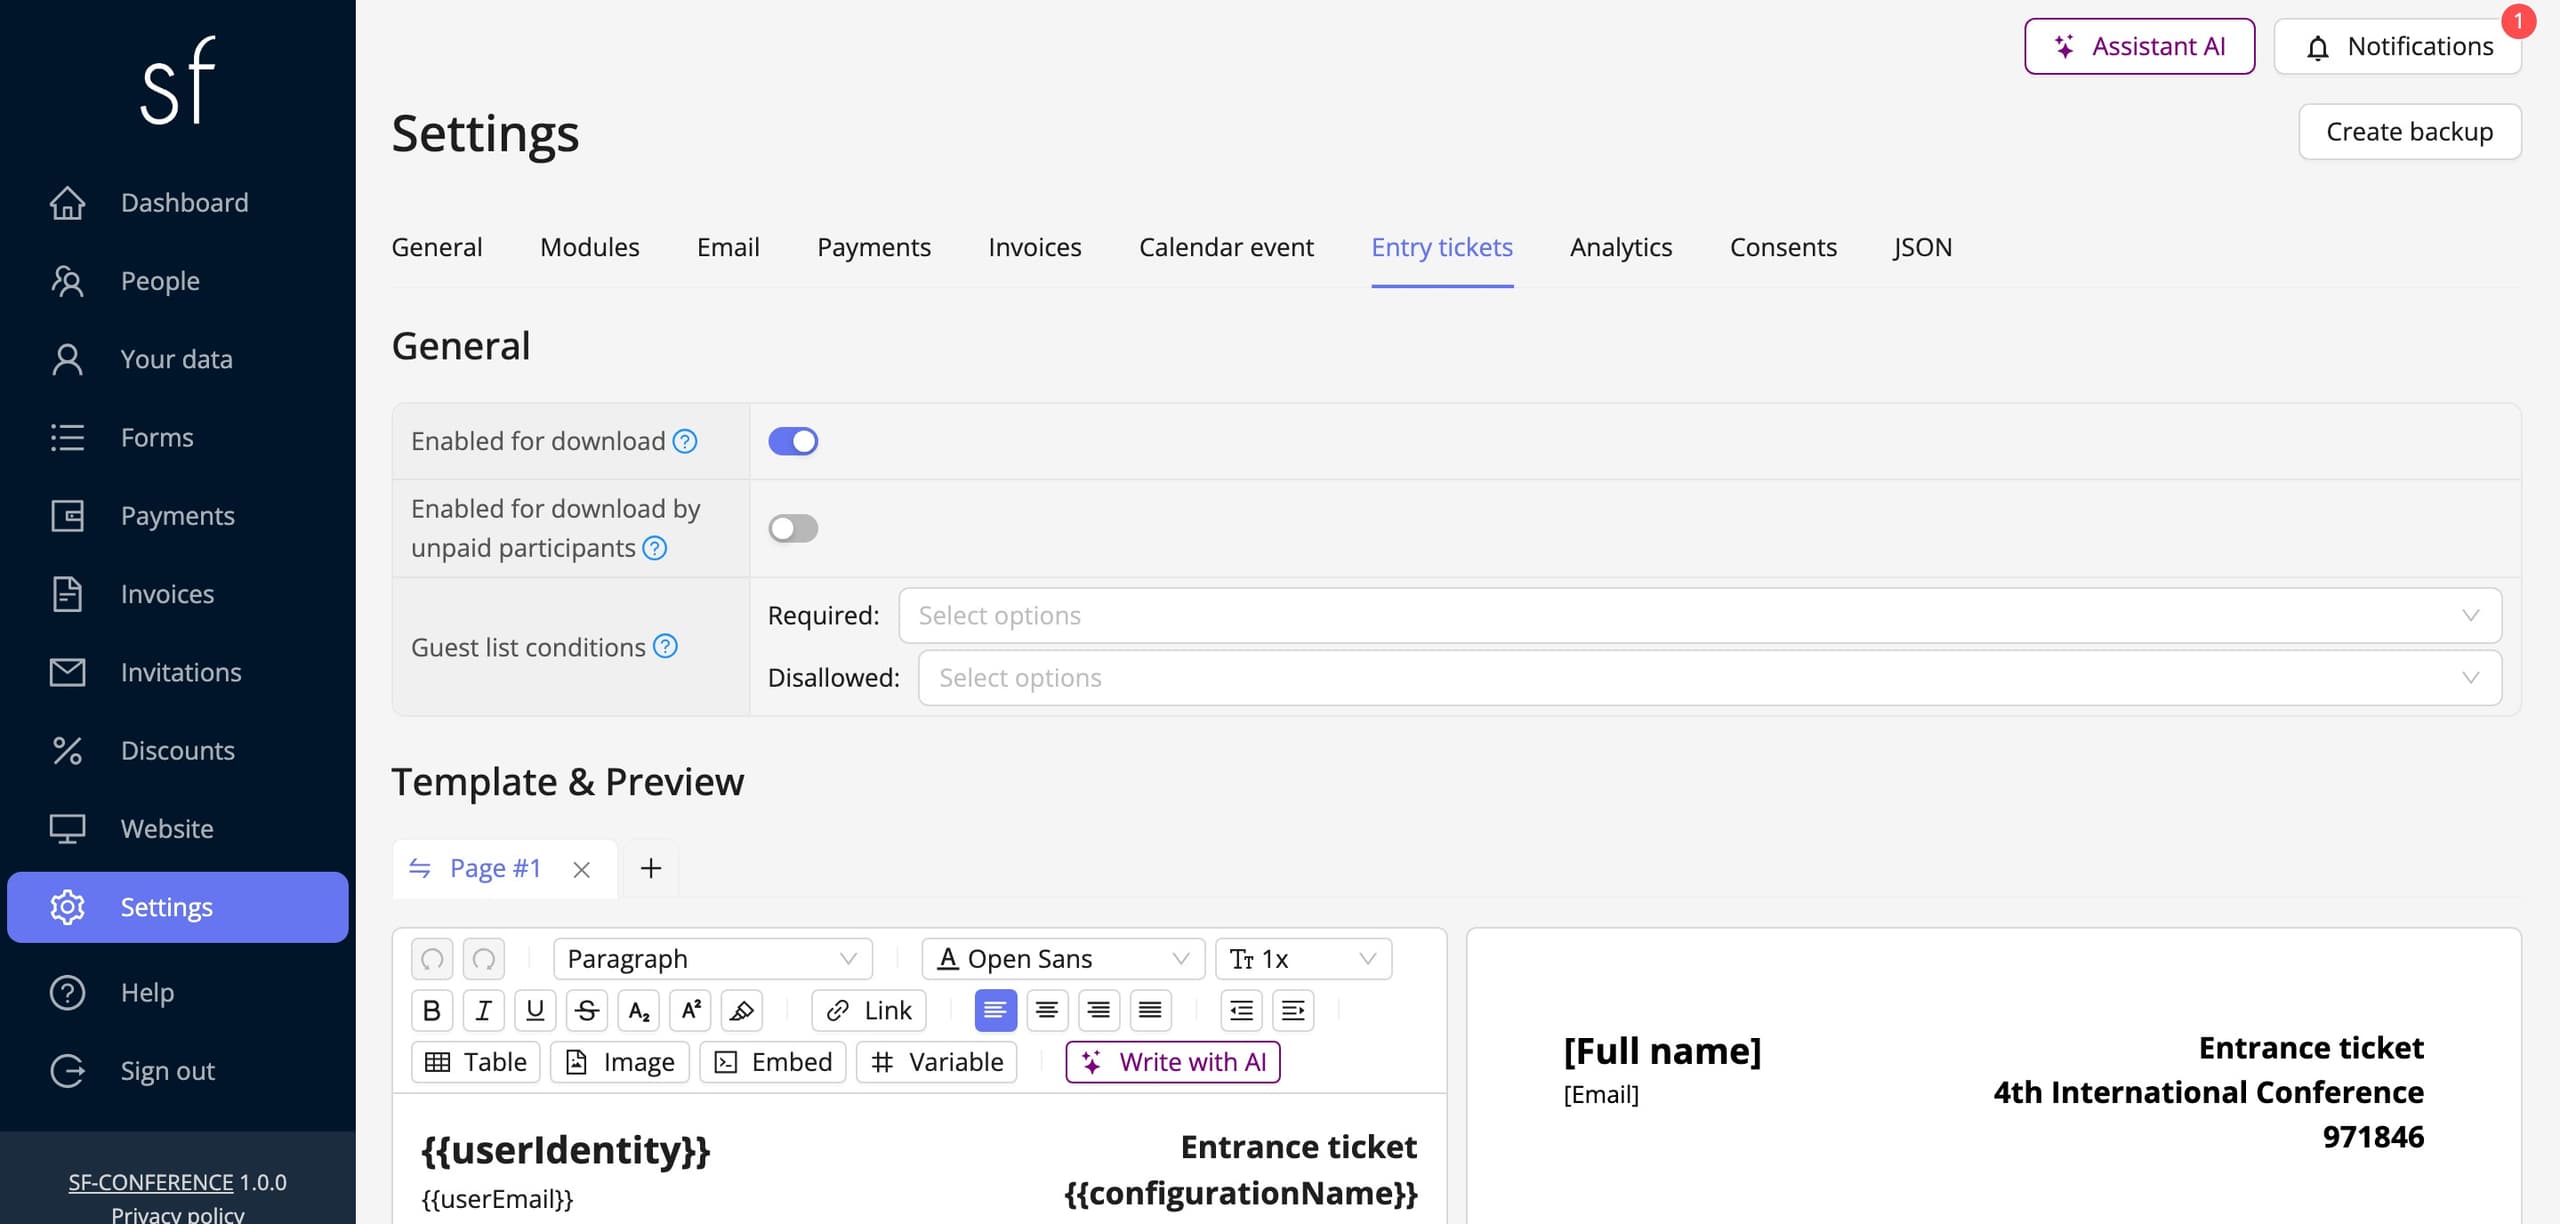
The Entry tickets tab starts with the General section and its three settings. Enabled for download makes the ticket available on the participation summary page, the attendee's private page, from which they also download their invoice or certificate. The second switch, Enabled for download by unpaid participants, is best turned off at a paid event: the ticket then appears only once the payment is booked and nobody stands in the doorway with a ticket they never paid for.
Guest list conditions restrict who gets a ticket at all, based on the answers from the form: the Required and Not allowed fields accept the registration form's options. At a hybrid event you would point them at, for example, on-site participation, and remote attendees simply never see a ticket.
The ticket template with a QR code
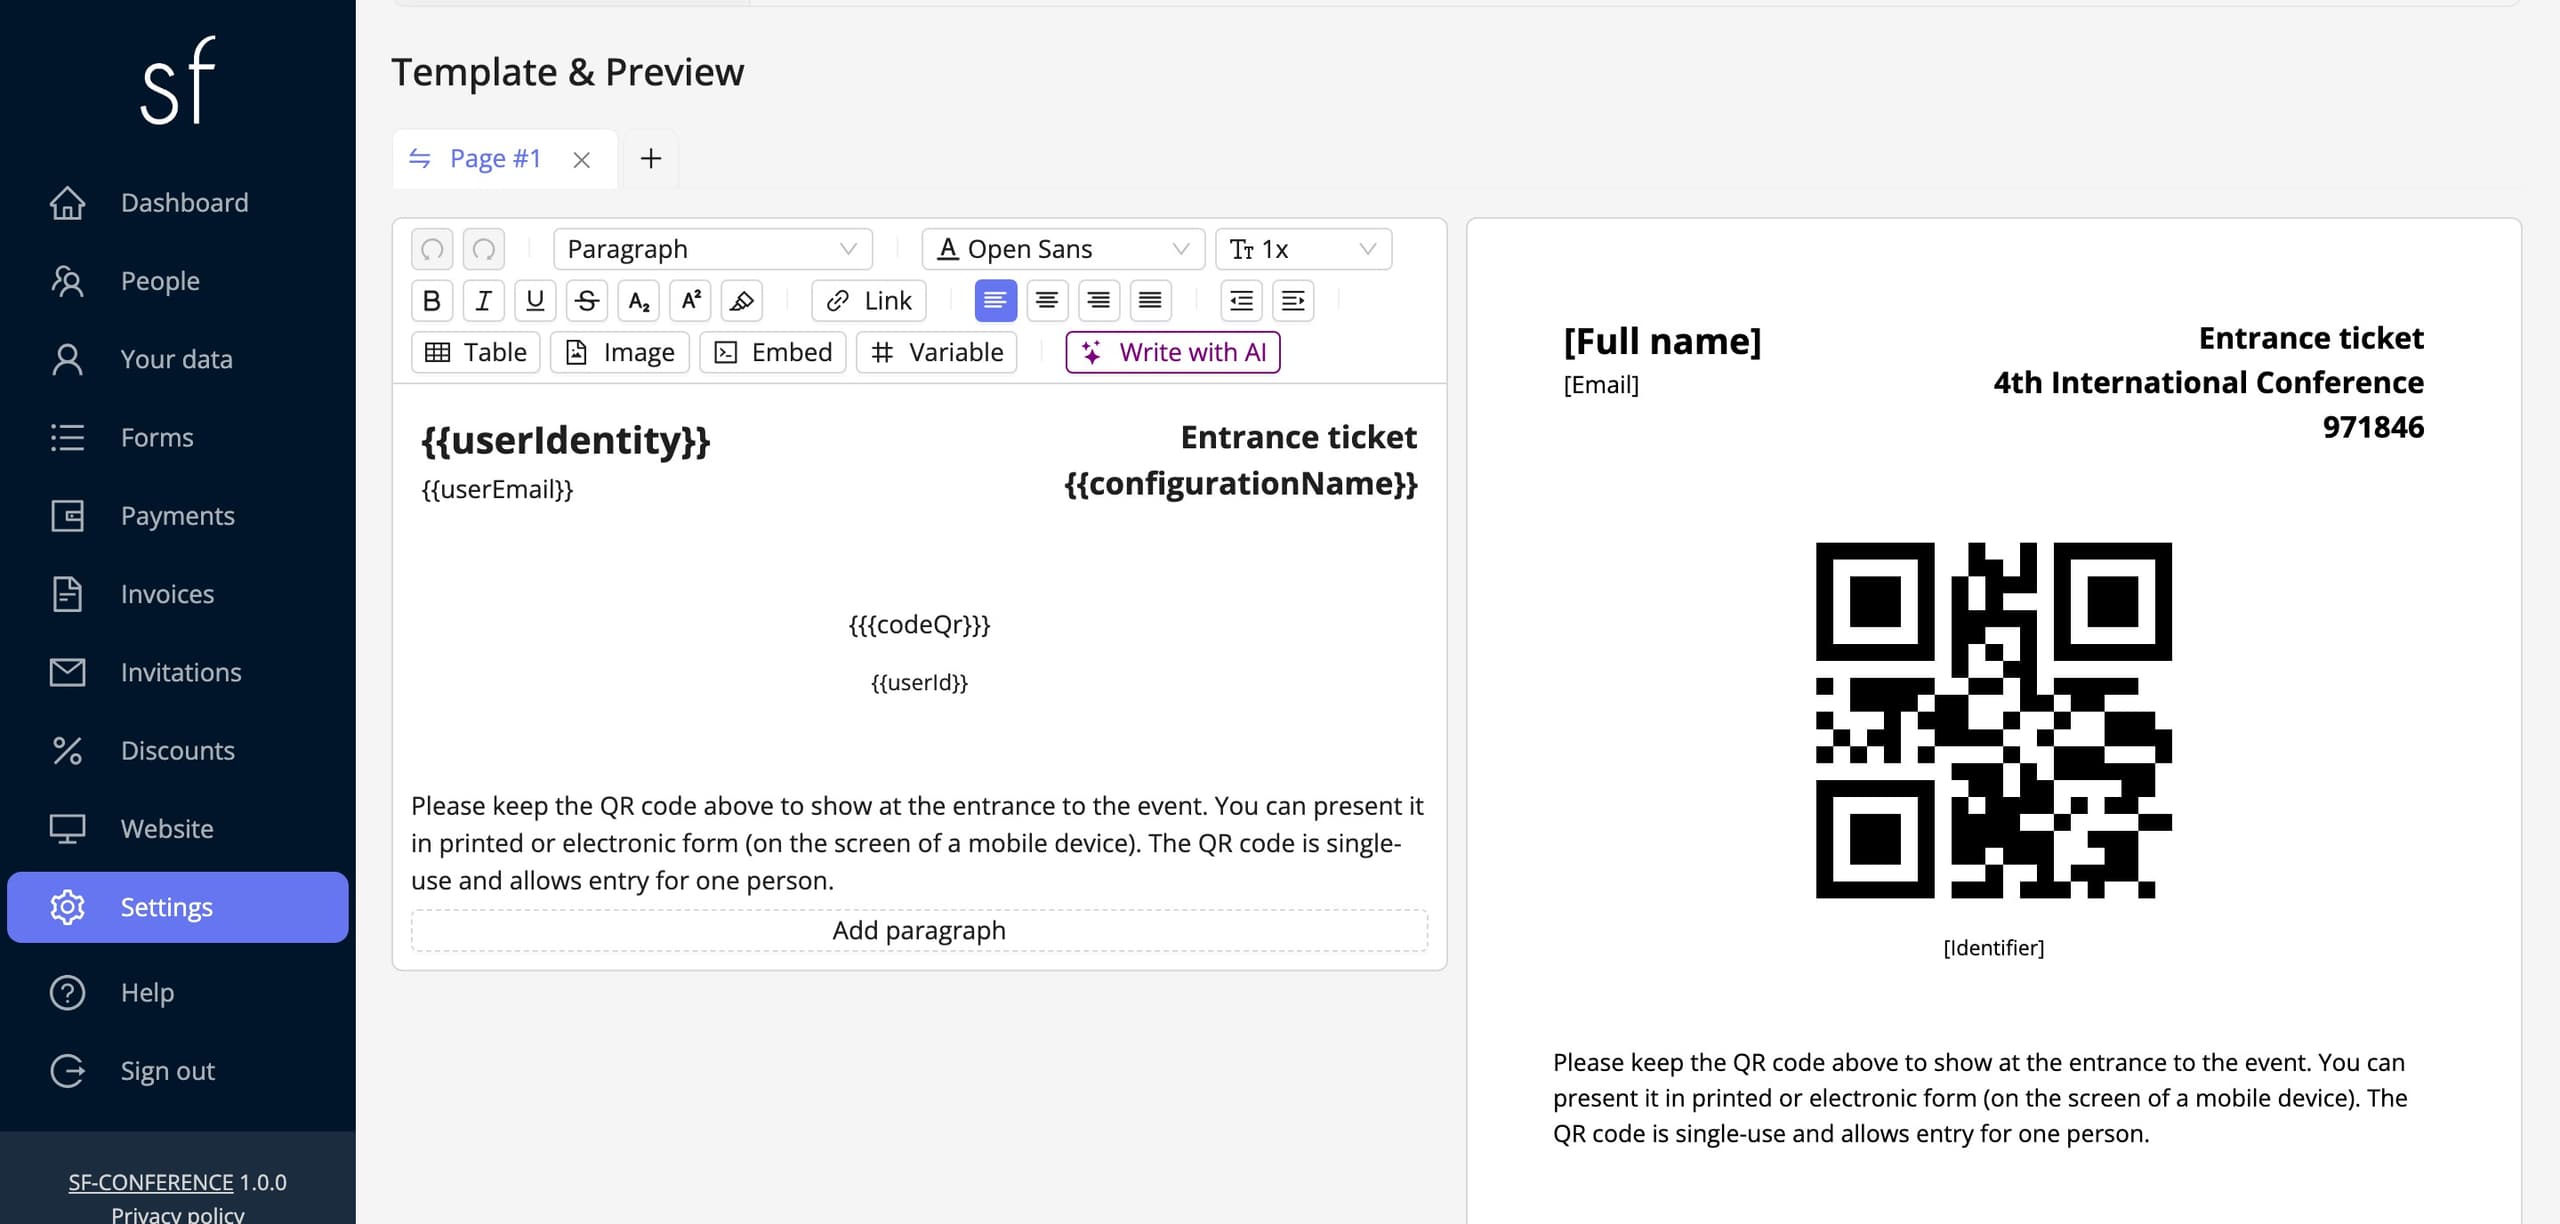
The Template & Preview section is the ticket content editor with a live-refreshed preview. The Variable button inserts fields substituted separately for each person: the first and last name, the e-mail address, the event name and the most important variable, QR code, which is the spot where that person's single-use code lands on the ticket. The code comes in three sizes, and alongside QR codes there are also bar codes. A ticket can have several pages, added with the plus button above the editor, so the second page can carry a building plan or the agenda.
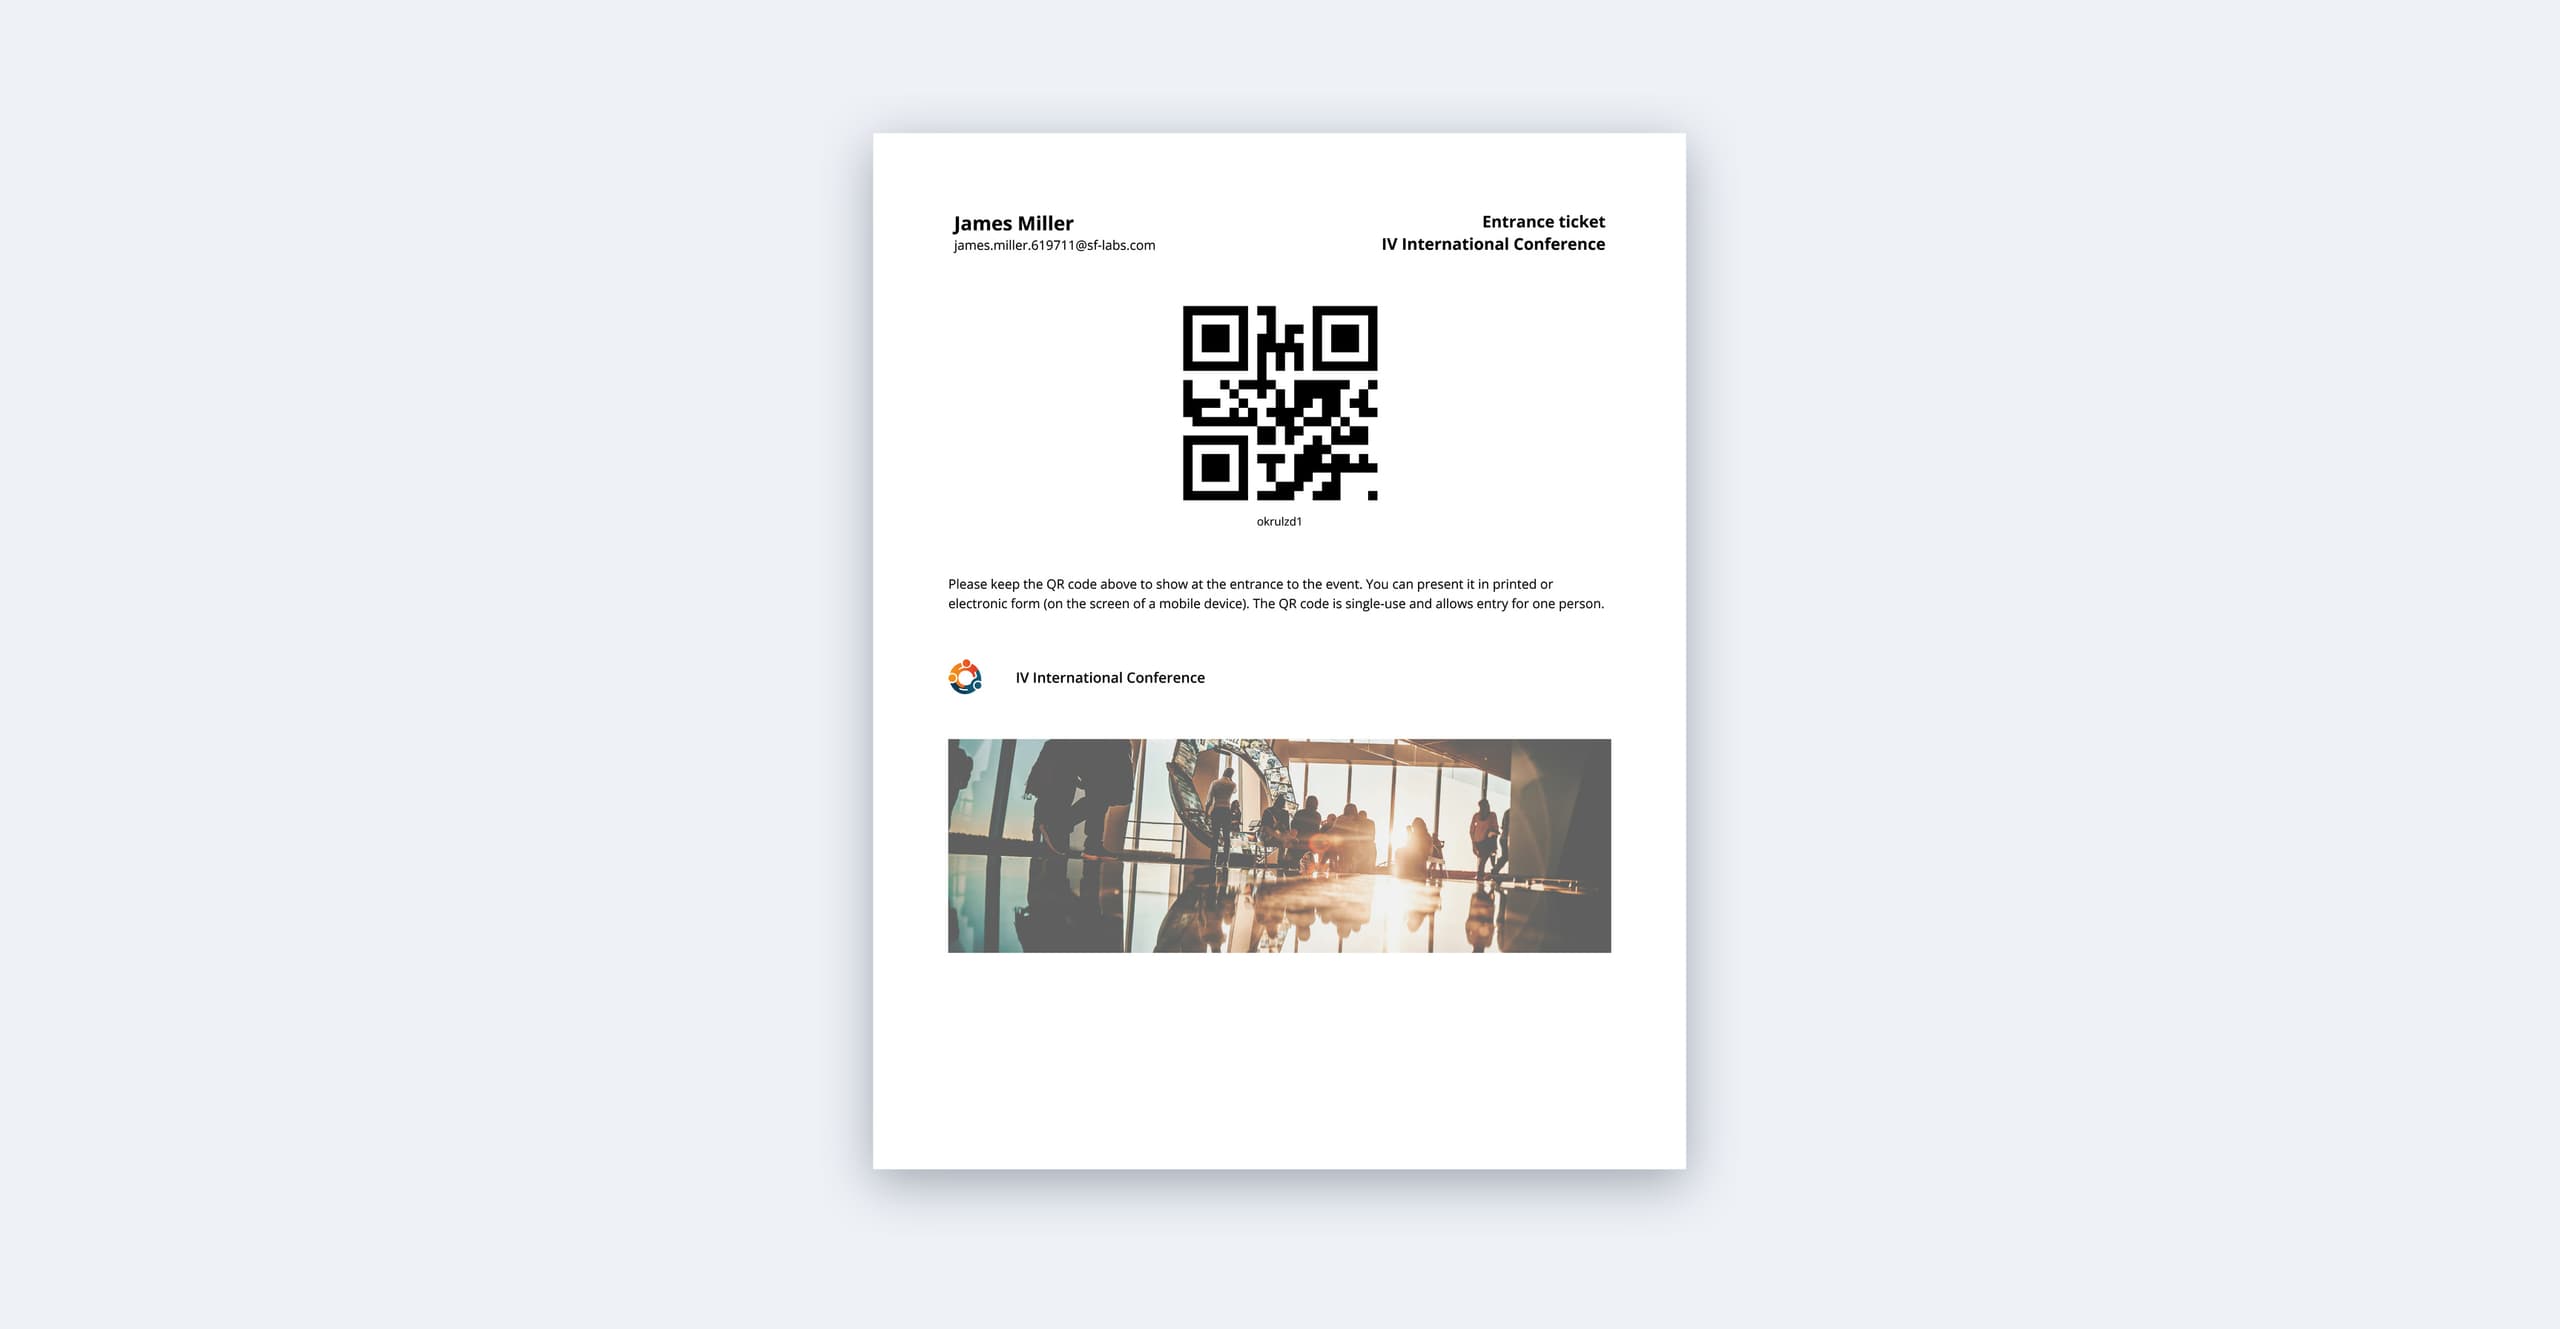
The downloaded document is a print-ready PDF with the specific person's data and their QR code in place of the variables.
How the ticket reaches the attendee
The attendee downloads the ticket themselves from the participation summary page, so the simplest delivery is a message carrying the Participation summary link variable, sent from the People entry. The ticket can also travel as an attachment: the e-mail templates in the Settings entry have an Attach entry ticket toggle, for example on the payment confirmation, and the same option is available when sending by hand. A proven practice is one collective message with the ticket a day or two before the event, with a request to have the QR code ready on a phone or a printout.
Scanning in the panel with a USB scanner
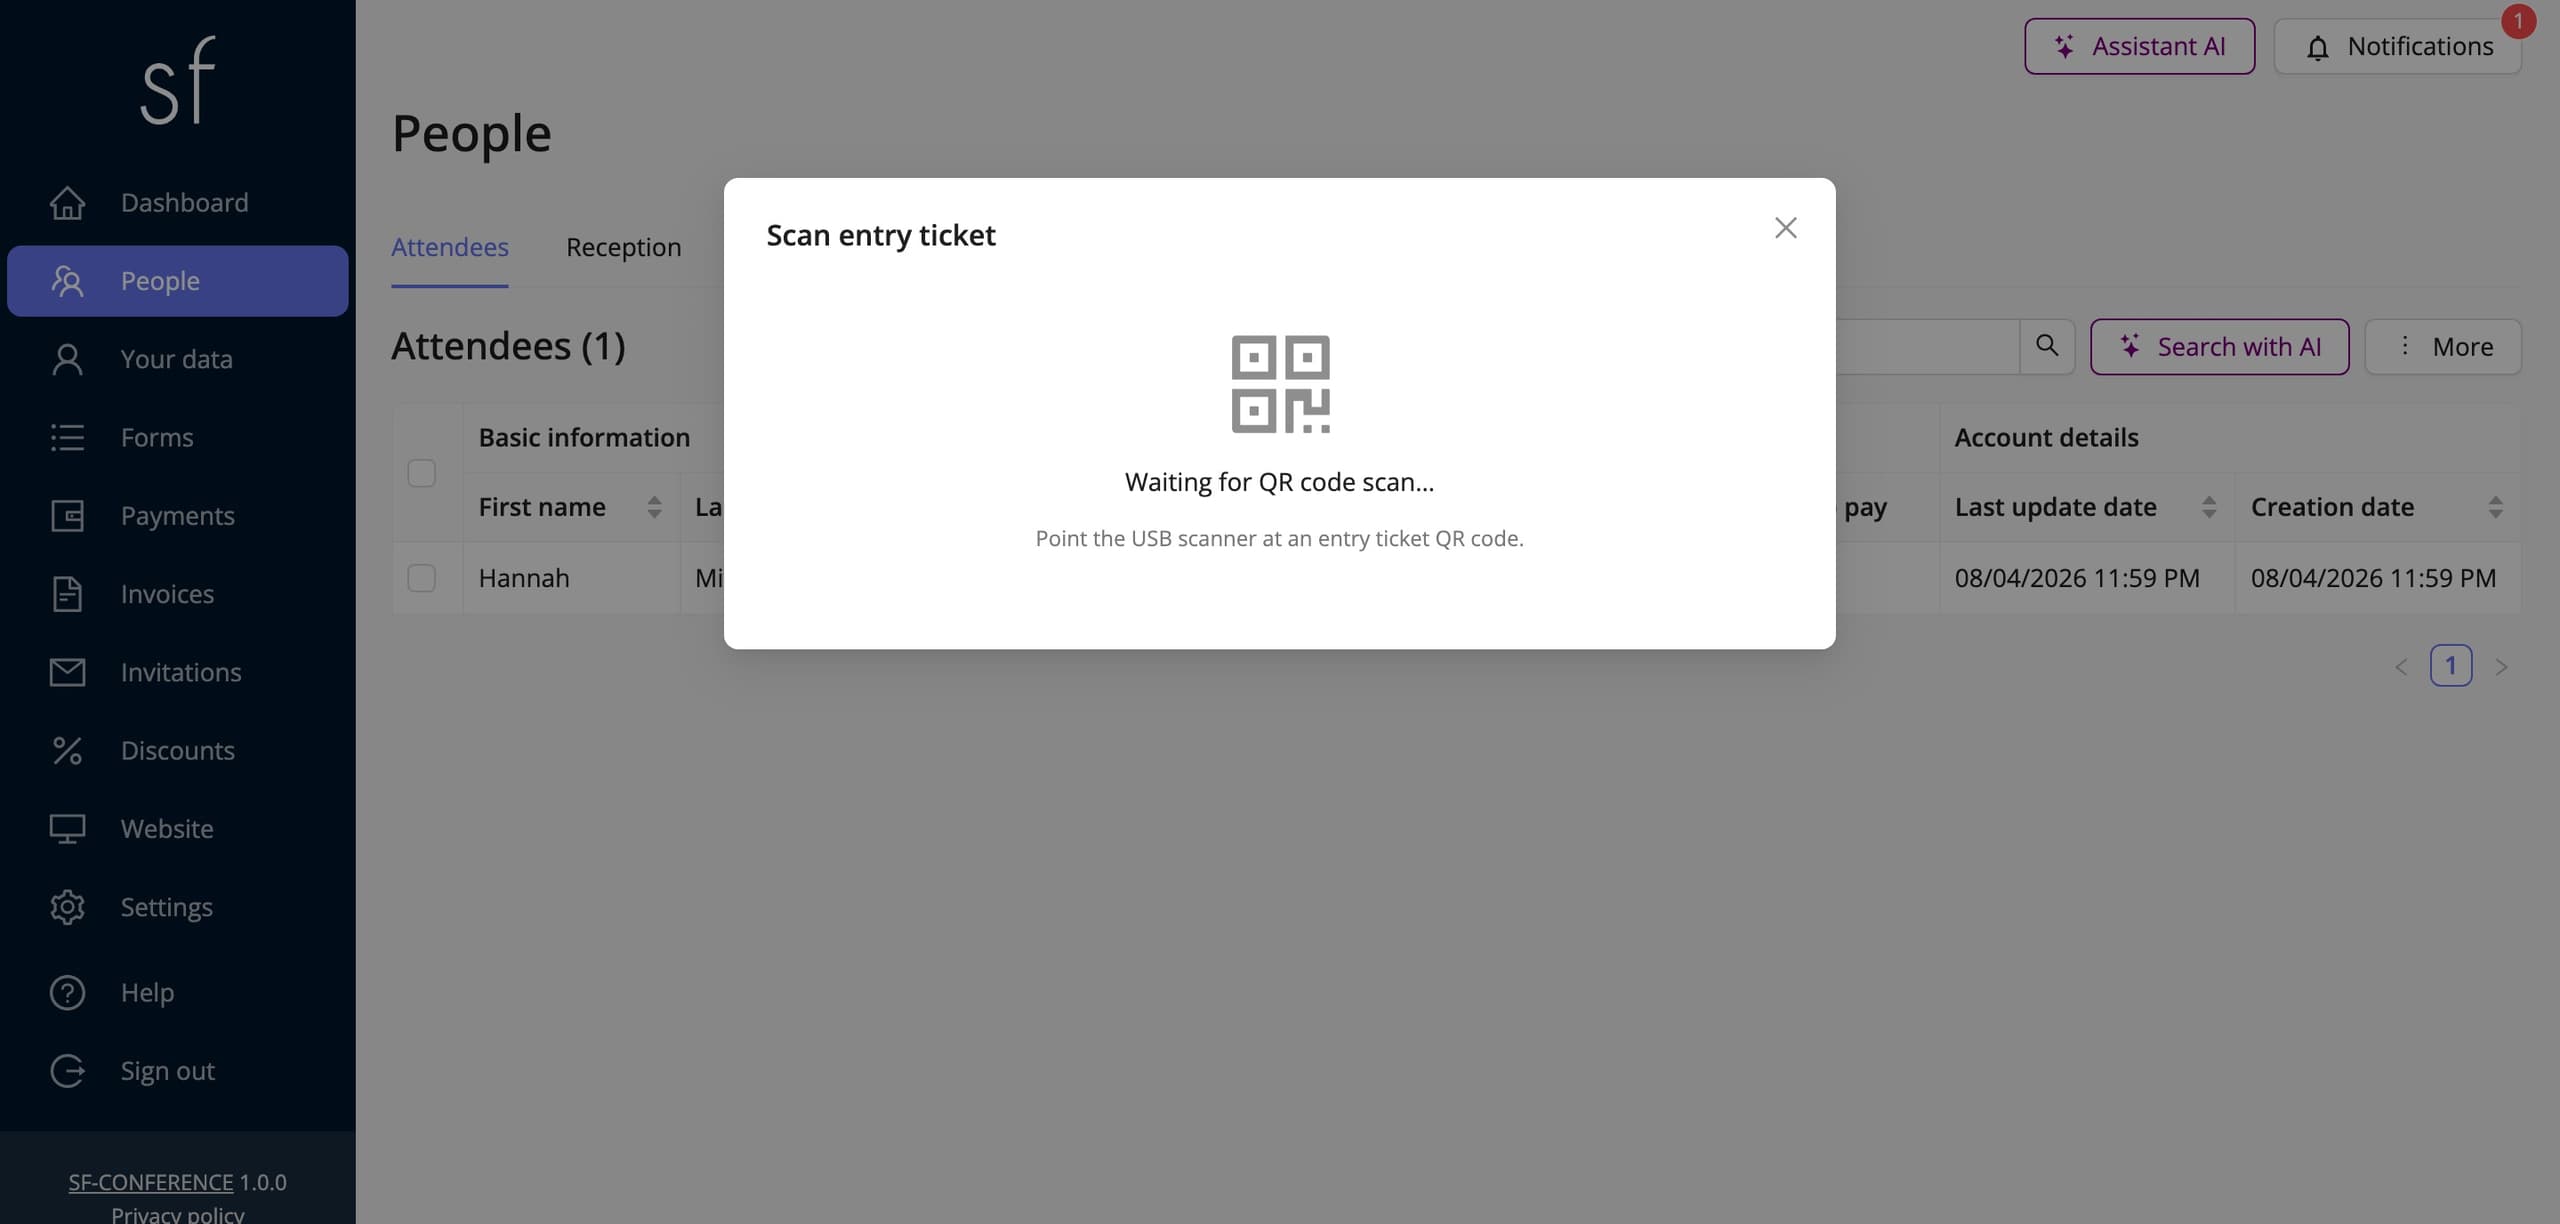
A desk with a computer needs nothing more than an ordinary USB QR code reader. It needs no drivers or configuration, because to the computer it is a keyboard that types out the contents of the code in an instant. In the People entry, under the More button, click Scan entry ticket. A window opens listening for the scanner and from that moment you just point the reader at consecutive tickets.
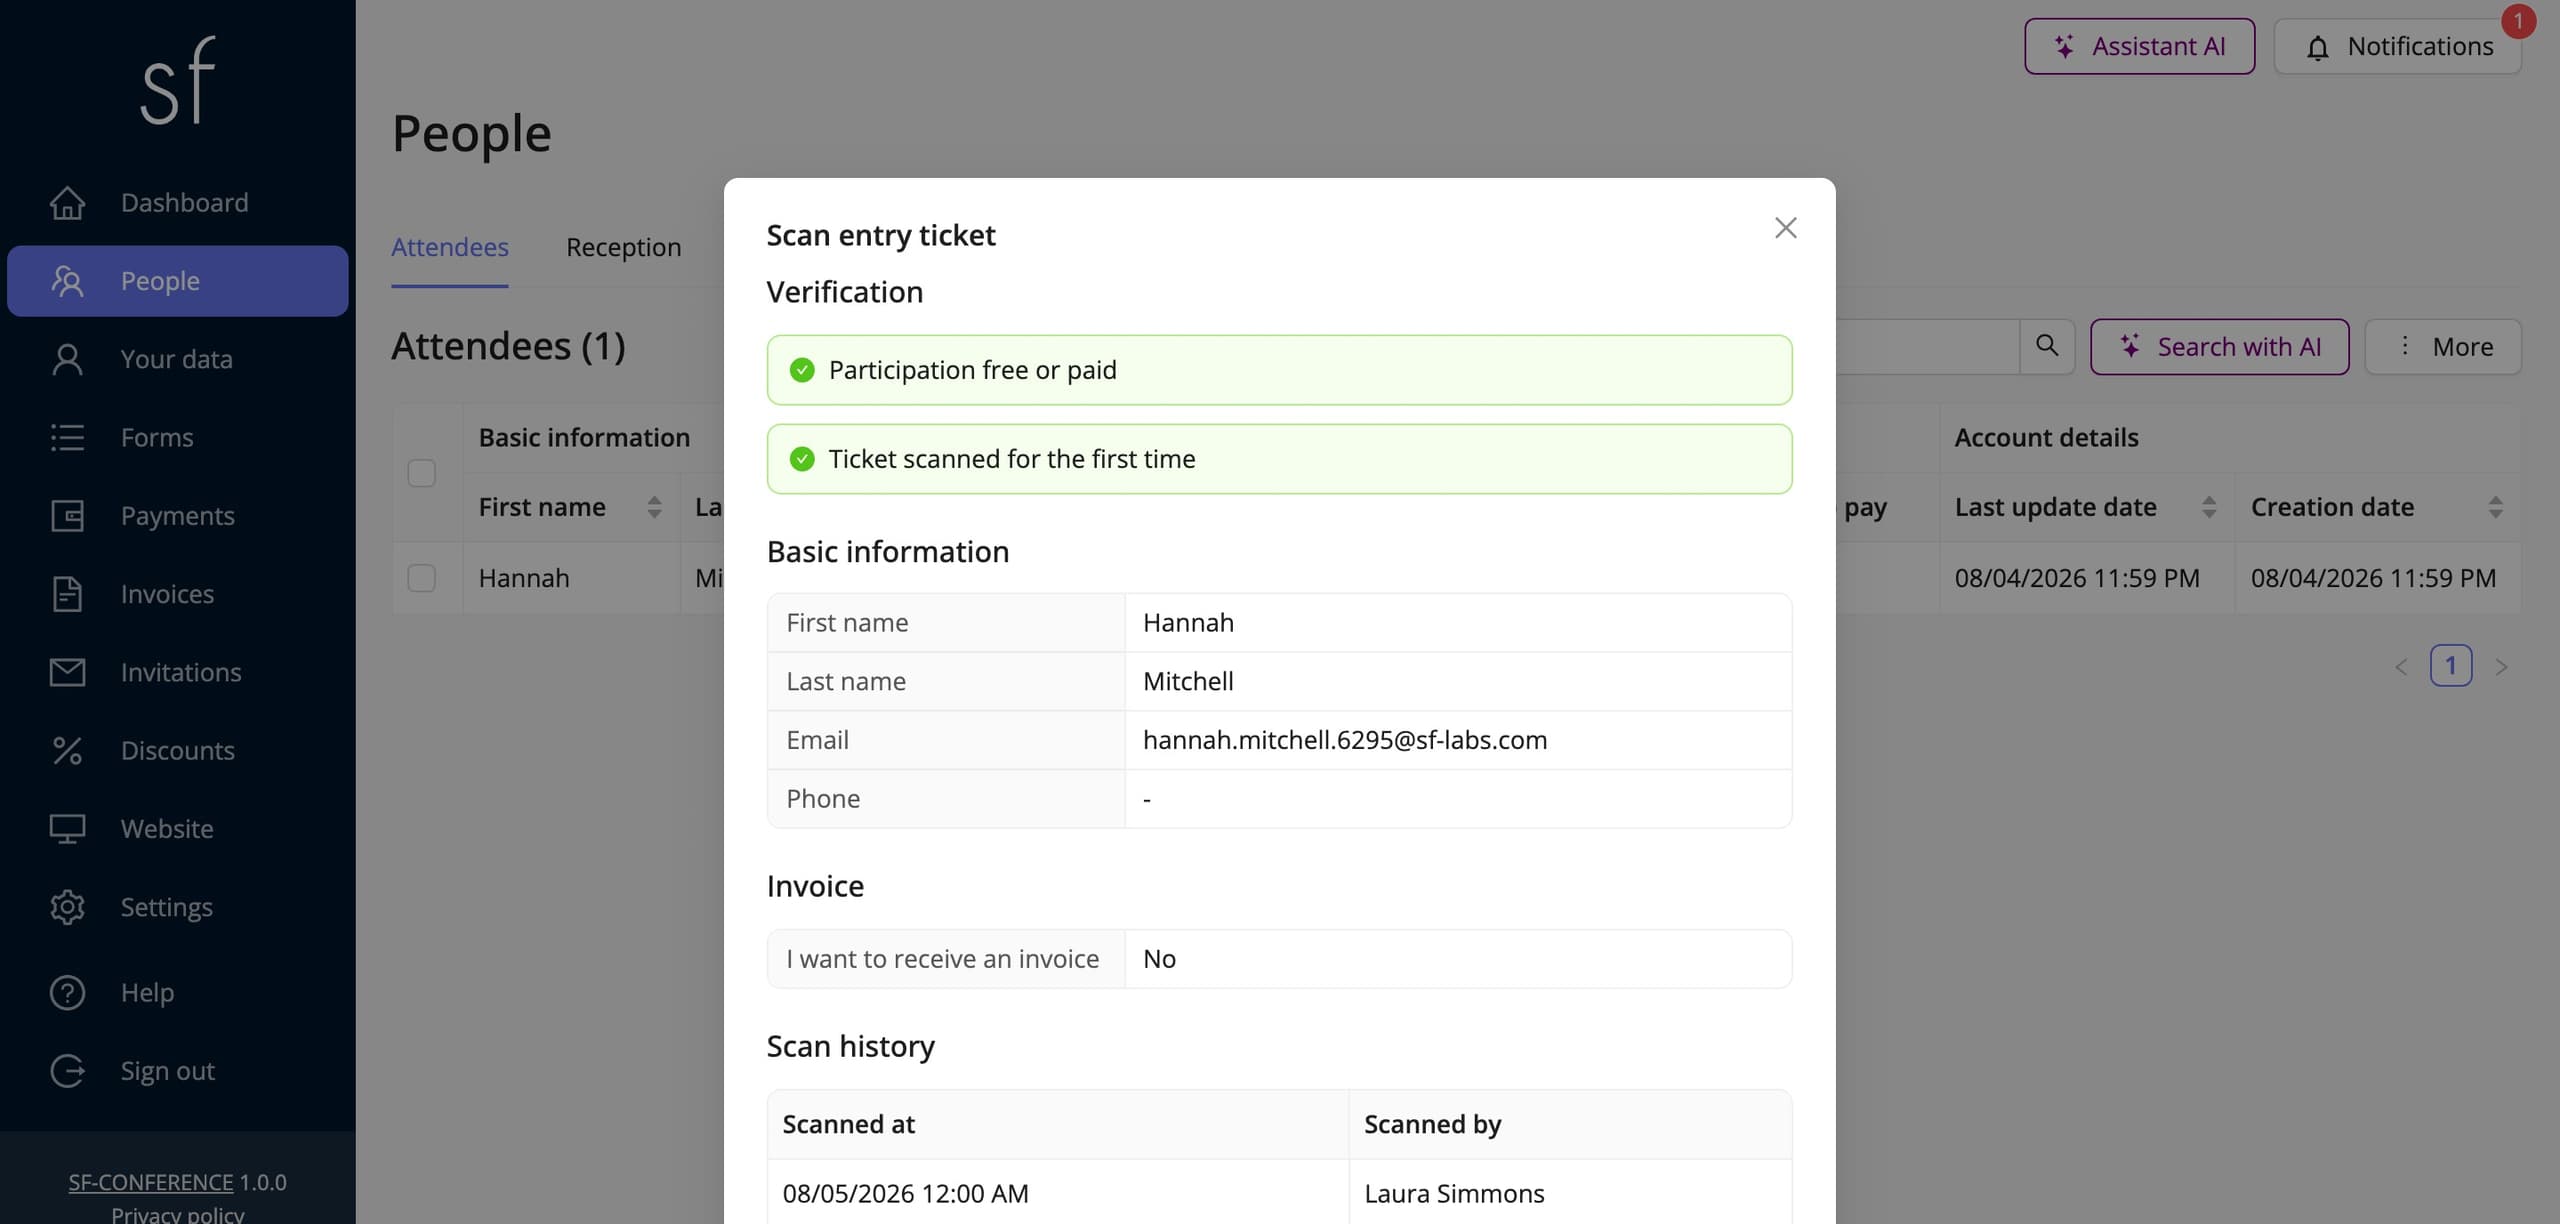
After every scan the system shows the verification. Two statuses answer the staff's two questions: whether the participation is free or paid, or unpaid, and whether the ticket was scanned for the first time or had already been scanned before. Below sit the attendee's data from the form along with the participation options, and the scan history with the date and the person who scanned. The buttons under the result lead to the person's details, for example to take a payment on the spot, print the badge on the desk's printer and go back to listening for the next ticket.
The look and format of the printed badge are set following the preparing attendee badges instruction.
Scanning with the mobile app
Right at the doors a phone is often handier. The SF-CONFERENCE mobile app for organizers, available in the App Store and Google Play, shows the number of attendees, the number of scanned tickets and the attendance live once you log in with the administrator account, and the Scan QR code button opens the camera. The scan result looks the same as in the panel: the statuses, the attendee's data and their participation options.




Information visible only after a scan
The registration form has a Visible after entry ticket scan field property. A field with this property does not appear at registration, but the staff sees its content in the scan result. It is a good place for reception notes, for example about collecting a VIP package or a special diet. Organizing the whole day of the event, from staffing the entrances to printing badges, is covered more broadly by the how to organize an in-person event guide.
See also
How to add an attendee
Add an attendee manually from the panel, without waiting for them to register through the registration form.
How to collect payments and issue invoices
Set the currencies, bank transfer and online payments, and let the invoices issue themselves.
How to issue certificates to attendees
Design a participation certificate with a background and variables, and attendees download it themselves from the summary page.

Complete event management on a single platform. An event website, attendee registration and a full set of organizer tools.
2026 © SF-LABS sp. z o.o. All rights reserved
Entered into the register of entrepreneurs of the National Court Register kept by the District Court for Kraków-Śródmieście in Kraków, 11th Commercial Division of the National Court Register, under KRS number 0000886671. Share capital amount: PLN 5,000.